Token Swaps And Bridges in UBot Studio

In this blog post, we’ll look at how to swap tokens on DeFi exchanges, and bridge USDC to different blockchains. These are some of the most essential skills for moving money around in the DeFi ecosystem.

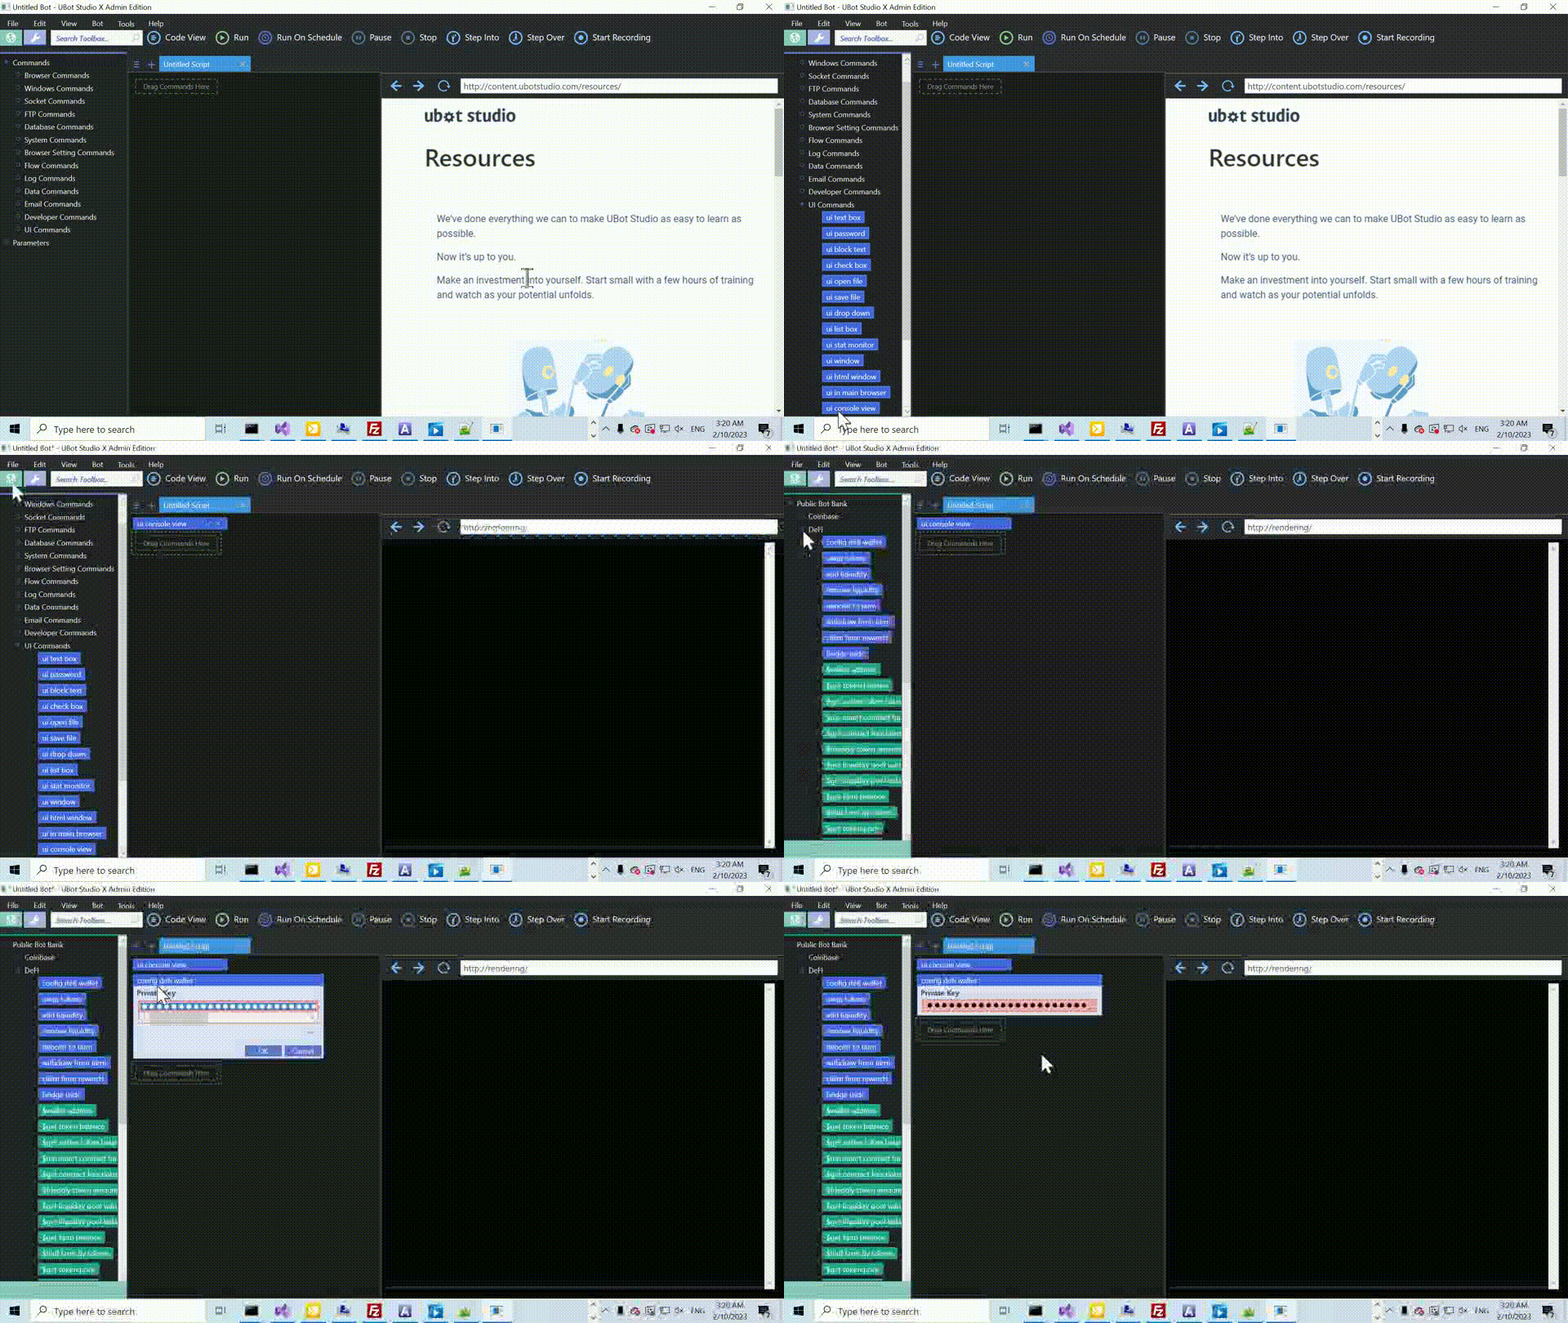
We’ll start out by setting up our console view, and configuring our DeFi wallet. Be sure to have your private key for your wallet. You can get this from your MetaMask wallet, as discussed in previous tutorials.

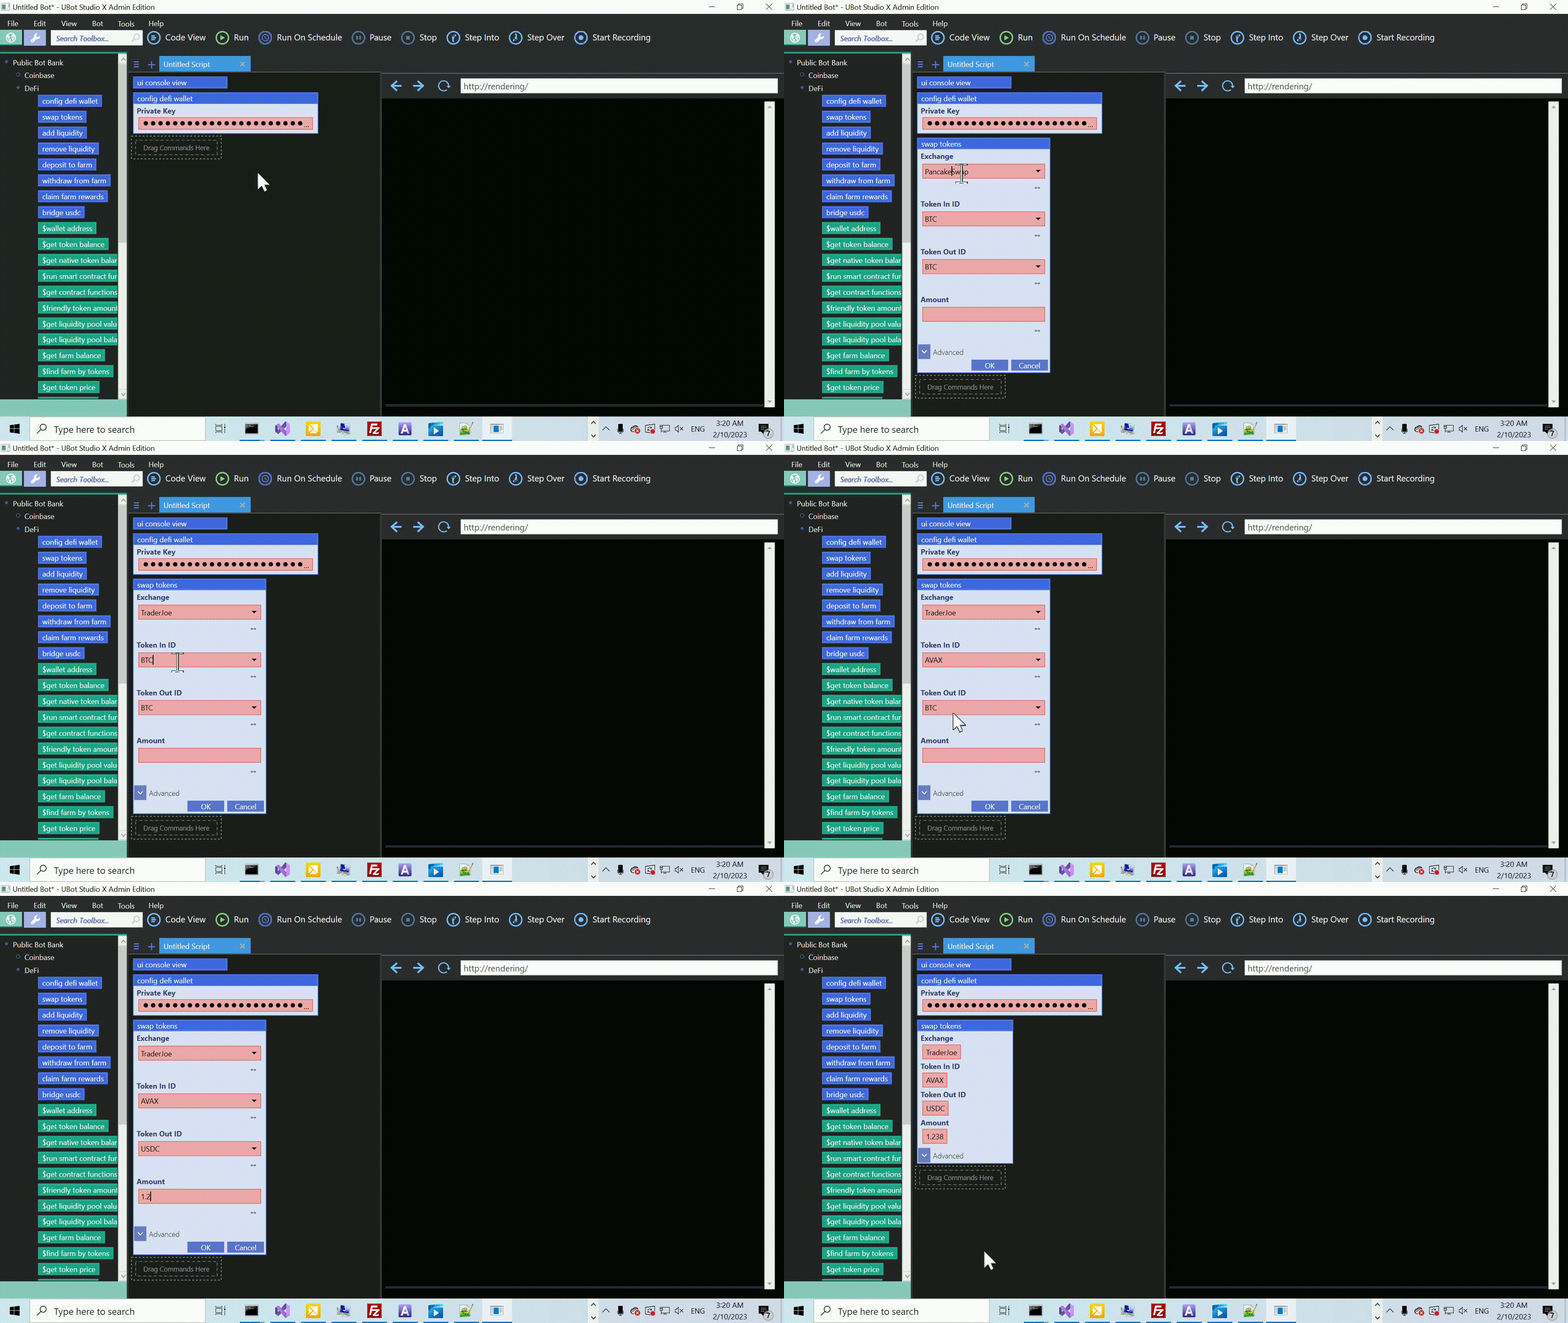
Next, we’ll make a swap on TraderJoe. We want USDC, so we’ll swap some of our AVAX. Our exchange will be TraderJoe, Token in will be AVAX, and Token out will be USDC. The amount will be $12, as this will help us in the next step.

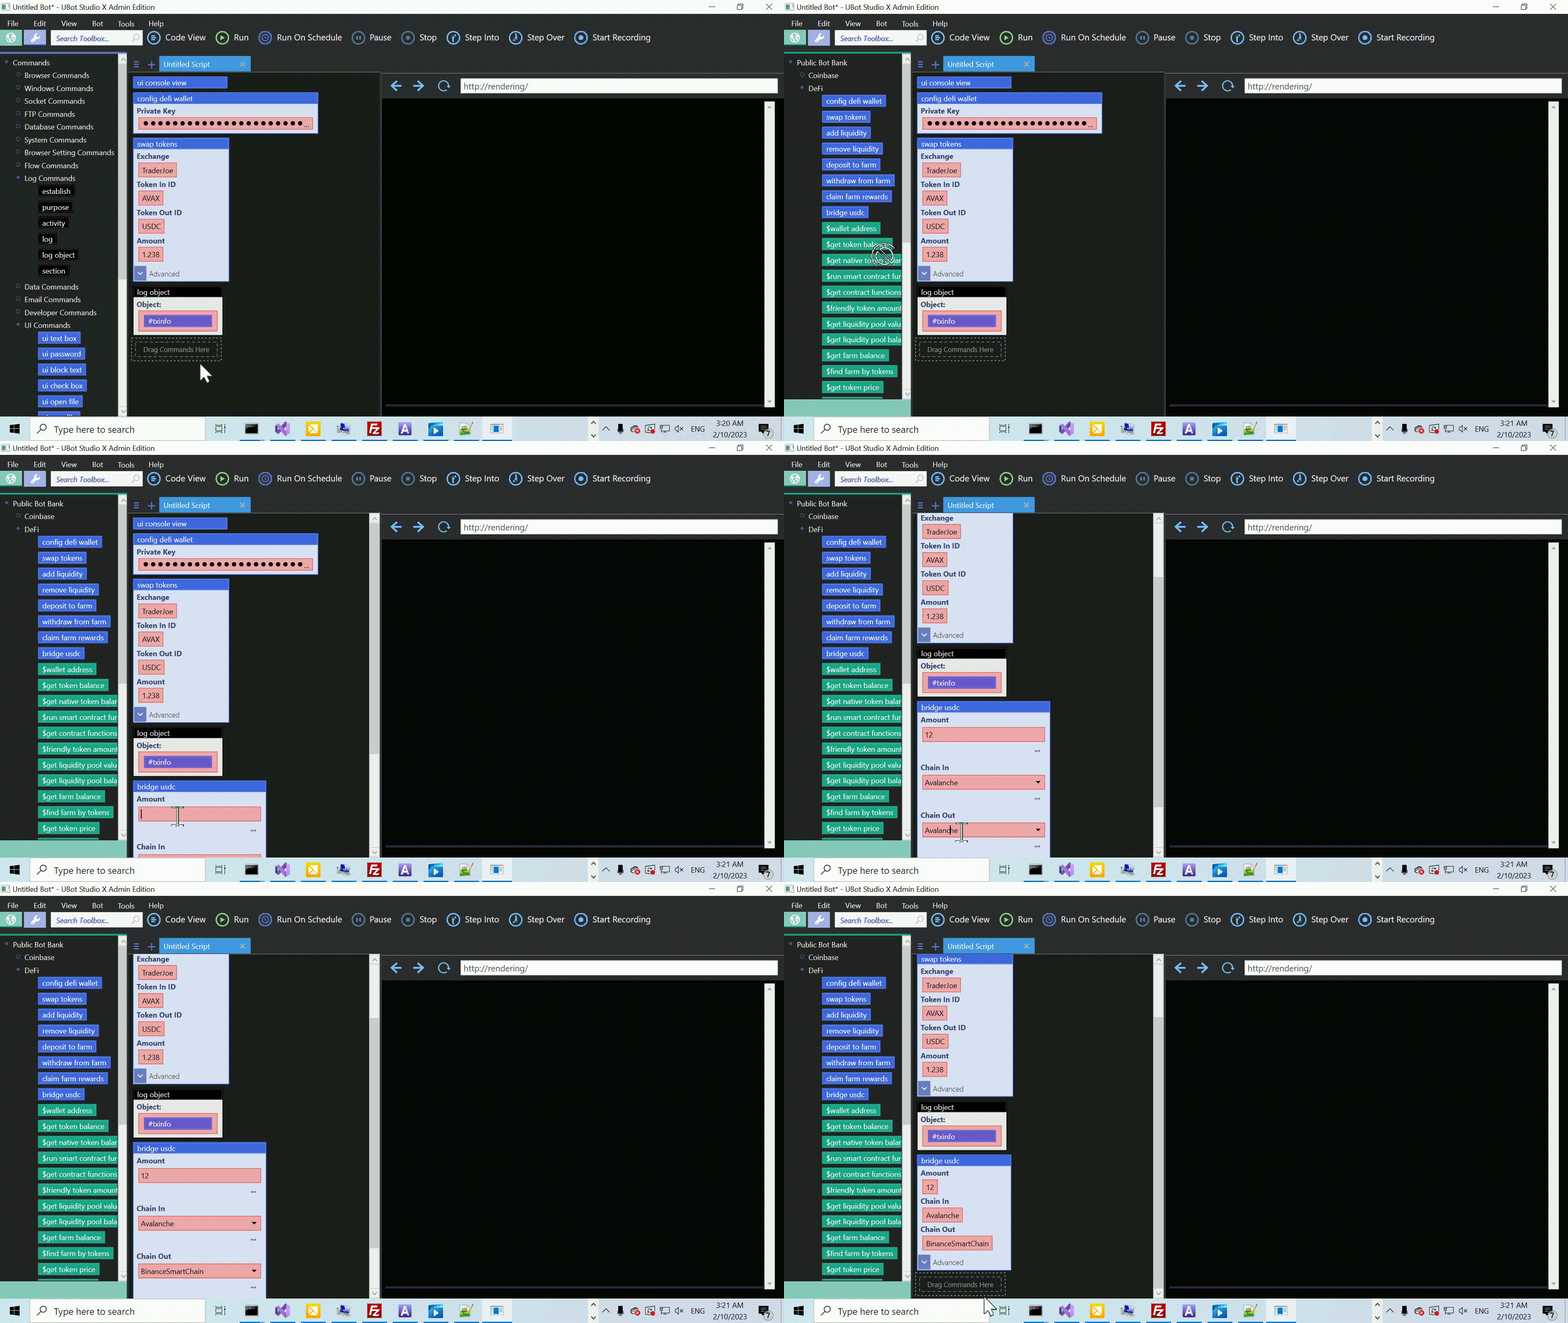
As always, it’s important to log everything we do on the blockchain. Let’s drag our log object command over and fill it with the #txinfo variable from the previous command. 

Finally, we’ll use the bridge usdc command to bridge the tokens from one network to another. For amount, we’ll put 12, because this is the minimum amount that we can bridge. The chain in will be Avalance, and the chain out will be BinanceSmartChain.

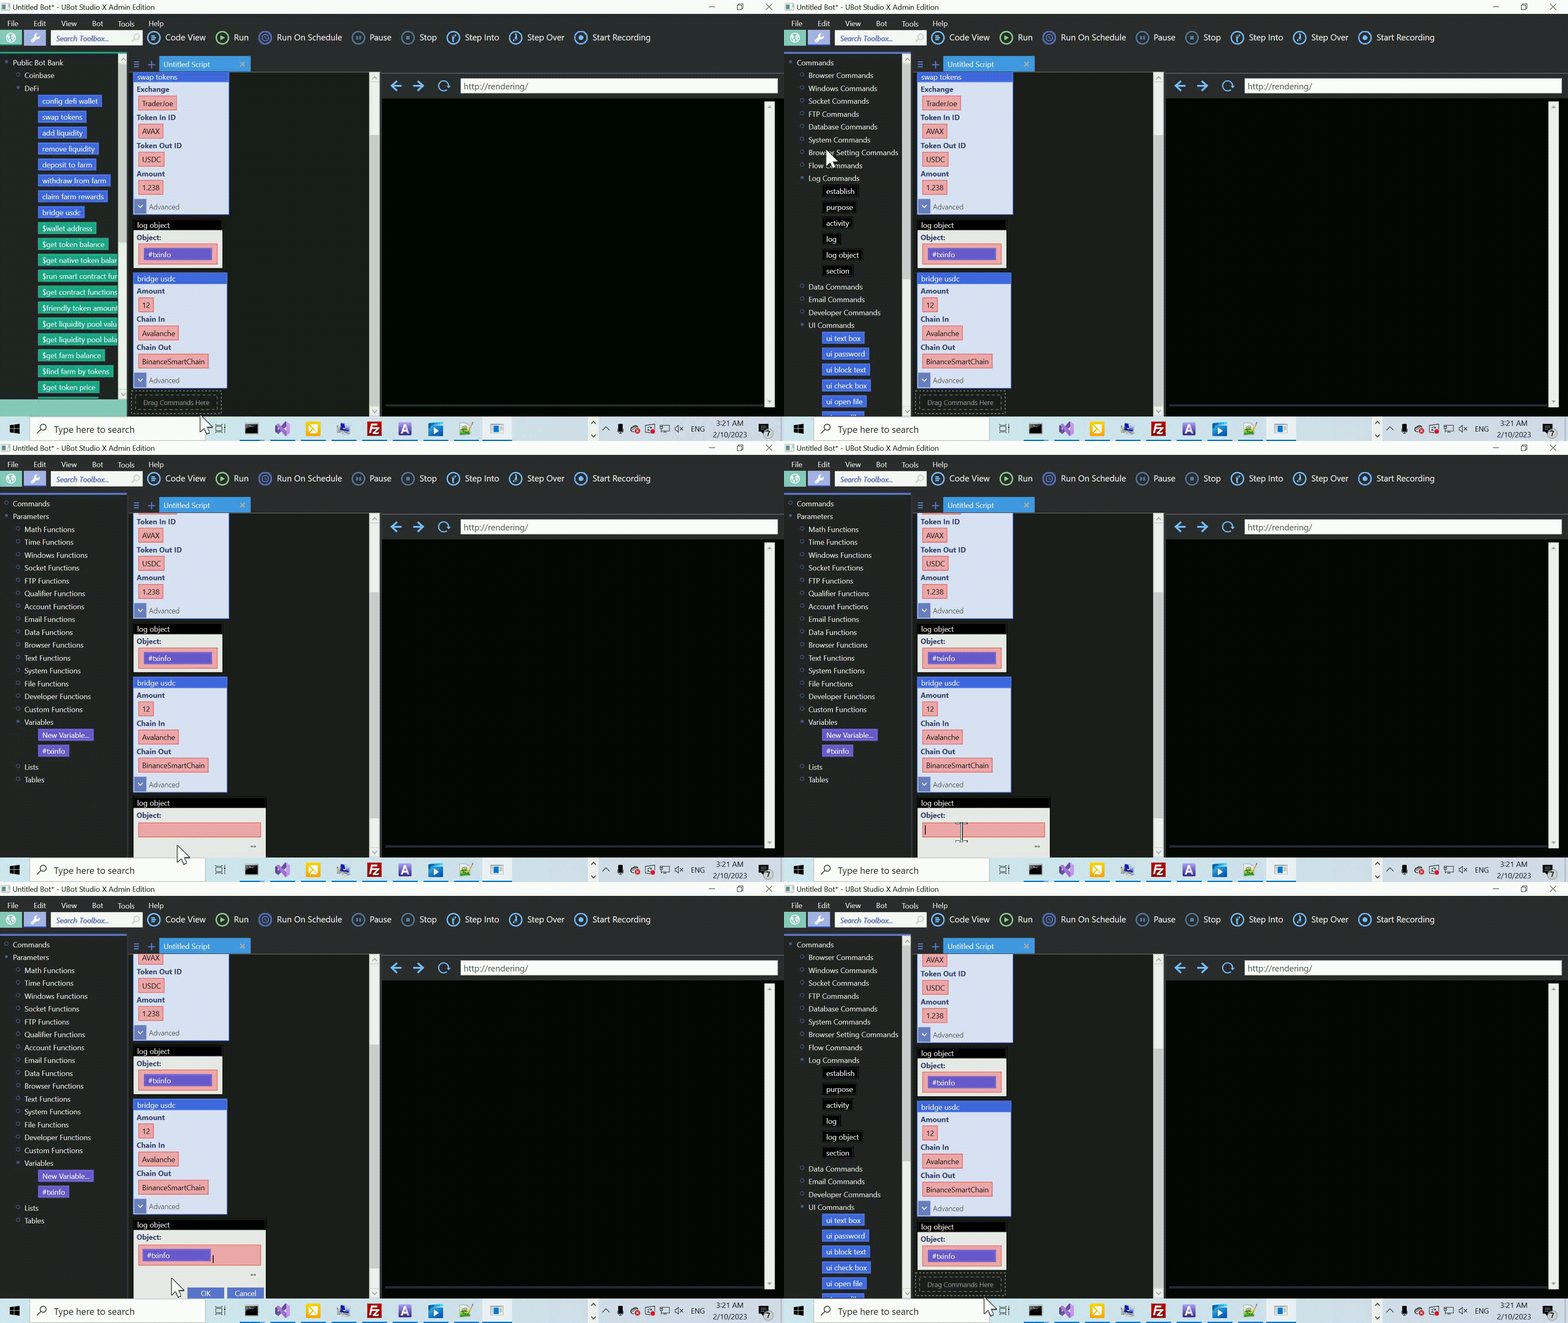
Finally, we’ll log our last transaction.

And that’s it! Now we can use that AVAX that we transferred from Coinbase, turn it into USDC or any other token, and move it across blockchains to work with different DeFi tools!

Hope this was helpful. See you next time.

ui console view
config defi wallet("")
swap tokens("TraderJoe","AVAX","USDC",1.238,#txinfo)
log object(#txinfo)
bridge usdc(12,"Avalanche","BinanceSmartChain",#txinfo)
log object(#txinfo)

Stress-Free Crypto Investing with a DCA Bot

In this tutorial, we’ll create a DCA bot that will invest weekly in the top 10 crypto coins, so that you can walk away, and invest without the stress.

Remember, investing in cryptocurrencies carries a risk, so be sure to do your own research and only invest what you can afford to lose.

ui in main browser {
    ui html snippet("<style>
  body \{
    background-color: #060606;
  \}
  .log-view \{
    background-color: #282c34!important;
    color: white;
  \}
</style> 
<link rel=\"stylesheet\" href=\"https://cdnjs.cloudflare.com/ajax/libs/highlight.js/11.7.0/styles/atom-one-dark.min.css\" integrity=\"sha512-Jk4AqjWsdSzSWCSuQTfYRIF84Rq/eV0G2+tu07byYwHcbTGfdmLrHjUSwvzp5HvbiqK4ibmNwdcG49Y5RGYPTg==\" crossorigin=\"anonymous\" referrerpolicy=\"no-referrer\" />

")
    ui log view("Log")
}
define purchase crypto {
    config coinbase("","","")
    set list(%coins,$list from object($get top x coins(10)),"Local")
    with each(%coins,#coin) {
        set(#symbol,$change text casing($object entity(#coin,"symbol"),"Upper Case"),"Local")
        if($is eligable(#symbol)) {
            then {
                set(#exchange,"{#symbol}-USD","Local")
                log("Purchasing: {#symbol}")
                exchange crypto on coinbase(16.67,#exchange,"Buy",#txinfo)
                log(#txinfo)
                wait(1)
            }
            else {
            }
        }
    }
}
define $is eligable(#coin name) {
    return($not($contains("USDT,USDC,BUSD,BNB",#coin name)))
}
purchase crypto()
Funding your DeFi Wallet With UBot Studio

In this tutorial, we will be showing you how to exchange USD for AVAX on Coinbase, and then send it to your DeFi wallet using UBot Studio.

  1. Configure Coinbase and your DeFi Wallet on UBot Studio. This will allow the bot to access your accounts and perform the necessary actions. To do this, simply drag over config coinbase and config defi.
  2. Log every step of the process to ensure the safety and security of your cryptocurrency. This way, if anything ever goes wrong, you’ll have a thorough log of everything that has happened so that you can figure out exactly where your cryptocurrency is.
  3. Drag the exchange crypto on coinbase command and set it to buy AVAX with USD.
  4. Drag the send crypto from coinbase command and set it to send AVAX to your DeFi wallet address.
  5. Double-check your balances and logs before and after completing the transaction.

By following these simple steps, you’ll be able to efficiently and securely fund your DeFi wallet using UBot Studio. Happy trading!

Here’s the code:

ui in main browser {
    ui html snippet("<style>
  body \{
    background-color: #060606;
  \}
  .log-view \{
    background-color: #282c34!important;
    color: white;
  \}
</style> 
<link rel=\"stylesheet\" href=\"https://cdnjs.cloudflare.com/ajax/libs/highlight.js/11.7.0/styles/atom-one-dark.min.css\" integrity=\"sha512-Jk4AqjWsdSzSWCSuQTfYRIF84Rq/eV0G2+tu07byYwHcbTGfdmLrHjUSwvzp5HvbiqK4ibmNwdcG49Y5RGYPTg==\" crossorigin=\"anonymous\" referrerpolicy=\"no-referrer\" />

")
    ui log view("Log")
}
config coinbase("","","")
config defi wallet("")
log("USD Balance: {$get coinbase balance("USD")}")
log("AVAX Balance: {$get coinbase balance("AVAX")}")
log("Buying AVAX with USD")
exchange crypto on coinbase(2,"AVAX-USD","Buy",#txinfo)
log object(#txinfo)
set(#avax amount,$object entity(#txinfo,"filled_size"),"Global")
log("amount of AVAX purchased: {#avax amount}")
set(#wallet balance before,$get native token balance("Avalanche"),"Global")
log("Current amount in Wallet: {$get native token balance("Avalanche")}")
log("Sending AVAX to Wallet")
send crypto from coinbase(#avax amount,"AVAX",$wallet address("Avalanche"),#txinfo)
wait for condition($get native token balance("Avalanche") > #wallet balance before,#avax amount,60)
wait(10)
log("Amount in wallet after transfer: {$get native token balance("Avalanche")}")

Effortlessly configure your DeFi wallet with UBot Studio

In this tutorial, you will learn how to set up your DeFi wallet in UBot Studio.

  1. First, paste in your UI commands.
  2. Next, go to the DeFi category and drag over the config defi wallet command.
  3. You will need the private key to your DeFi wallet. To get this, you can use MetaMask. Go to metamask.io, download, and install the software. Once you have installed MetaMask, click on the little fox icon.
  4. To get your private key, click on the three dots, select Account Details, and click on Export Private Key. Enter your MetaMask password to view your private key, and copy it.
  5. In UBot Studio, paste the private key into the private key field and click OK.
  6. To make sure everything is working, add a log command and drag over the get token balance function. Select the USDC token, and click OK.
  7. Run the code and check the log to see your USDC balance.

That’s it! You have now set up your DeFi wallet in UBot Studio.

Here’s the code:

ui in main browser {
    ui html snippet("<style>
  body \{
    background-color: #060606;
  \}
  .log-view \{
    background-color: #282c34!important;
    color: white;
  \}
</style> 
<link rel=\"stylesheet\" href=\"https://cdnjs.cloudflare.com/ajax/libs/highlight.js/11.7.0/styles/atom-one-dark.min.css\" integrity=\"sha512-Jk4AqjWsdSzSWCSuQTfYRIF84Rq/eV0G2+tu07byYwHcbTGfdmLrHjUSwvzp5HvbiqK4ibmNwdcG49Y5RGYPTg==\" crossorigin=\"anonymous\" referrerpolicy=\"no-referrer\" />

")
    ui log view("Log")
}
config defi wallet("")
log("USDC Balance: {$get token balance("Avalanche","USDC")}")

UI in the Main UBot Browser – Expand Your Vision and Create Beautiful Interfaces

In this tutorial, we’ll be demonstrating how to use the ui in main browser and log object commands, as well as the ui html snippet command to customize the appearance of your bot.

First, let’s start by using the ui in main browser command. Drag this command into your script and click “ok”. Now, we can add a log view to our main browser by dragging in a ui log view and clicking “ok”.

Next, let’s use the log object command to display information in a more organized and easy-to-read manner. Imagine that we have an object called #txinfo that we want to display in our log view. To do this, we can set #txinfo as a variable in yaml format, and then use the log object command to display it in our log view.

Finally, let’s use the ui html snippet command to customize the appearance of our bot. By adding a style tag, we can change the background color and text color to our liking.

These new features of UBot Studio make it easier to display information and customize the appearance of your bot.

Here’s the code! You can copy and paste it directly into the script window.

ui in main browser {
    ui html snippet("<style>
	body \{
		background-color: #060606;
	\}
	.log-view \{
		background-color: #282c34!important;
		color: white;
	\}
</style>
<link rel=\"stylesheet\" href=\"https://cdnjs.cloudflare.com/ajax/libs/highlight.js/11.7.0/styles/a11y-dark.min.css\" integrity=\"sha512-Vj6gPCk8EZlqnoveEyuGyYaWZ1+jyjMPg8g4shwyyNlRQl6d3L9At02ZHQr5K6s5duZl/+YKMnM3/8pDhoUphg==\" crossorigin=\"anonymous\" referrerpolicy=\"no-referrer\" />")
    ui log view("Log")
}
set(#txinfo,"gasBalance: \"0.131078355\"
coinsNames:
	in: Cake
	out: USDC
balances:
	in: \"0.00167\"
	out: \"5.57607\"
amount: \"0.00167\"
amountIn: \"0.00167\"
minAmountOut: \"0.00749\"
method: swapExactTokensForTokens
gasFee: \"0.000281308\"
hash: \"0x1c715fecaxx715fexx756474567715fe015657459e836e74715fe\"
status: successful
endingBalances:
	A: \"0.00\"
	B: \"5.58\"","Local")
log object(#txinfo)