Bots That Think Like Creatives, Create Like Artists
Today, we’re taking a deeper look at another game-changing feature in UBot Studio: AI image generation!
AI Image Generation in UBot Studio?
In just a few years, AI image creation has gone from interesting-but-useless nerd hobby, to powerful tool in real content generation. Now, with UBot Studio’s “create AI image” command, you can generate high quality images directly in your workflow, to use however you like. Here’s how easy it is:
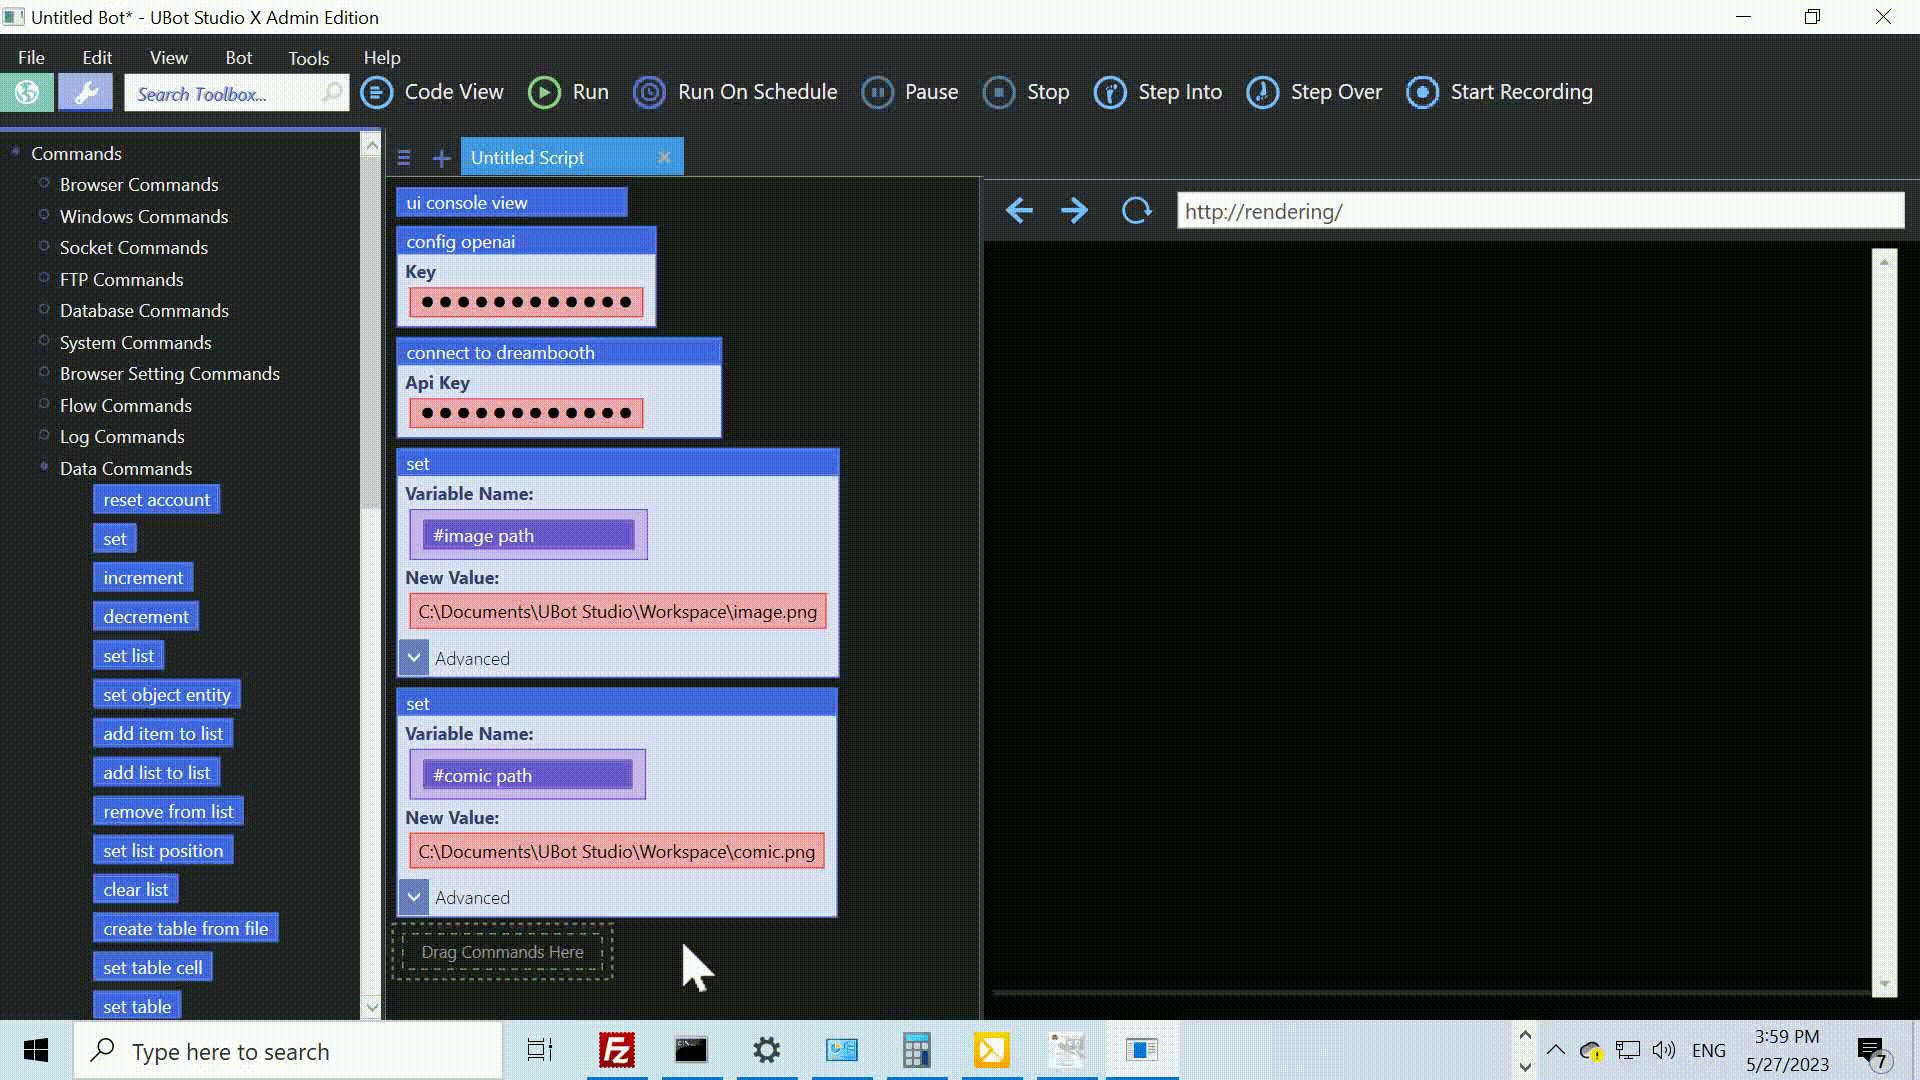
- Drag the
ui console viewandcreate ai imagecommands into the script window. - Describe the image you want using the
promptparameter. - Add a LORA to guide the AI toward a specific style or character (optional).
- Add the
log imagecommand to display the generated image in the console window. - Click Run, and watch the AI bring your idea to life!
What Are LORAs?
LORAs (Low-Rank Adaptations) are specialized models that enhance AI image generation by applying specific styles or themes. They can help you create anything from photorealistic landscapes to anime-style characters. LORAs are great for fine-tuning images, adding unique artistic elements, and even generating consistent characters for storytelling or design projects. Simply add a LORA URL in UBot Studio, and watch as your images take on a whole new dimension!
Parameters
Here’s a quick breakdown of the parameters:
- Prompt:
Describes the image you want to create. Be specific about the subject, style, composition, and details for the best results. - Save Path:
Specifies where the generated image will be saved. - LORA URL:
Provide an optional link to a LORA model, which influences the AI’s style. - Number of Outputs:
Controls how many images the AI will generate in one run. - Aspect Ratio:
Determines the proportions of the generated image. Common options include:- 1:1 (square)
- 9:16 (portrait)
- 16:9 (landscape)
- 4:3 (standard)
- 3:4 (vertical standard)
- Guidance Scale:
Controls how closely the AI follows your prompt. Higher values make the image more prompt-specific, while lower values allow for more creative freedom. - Inference Steps:
Sets the number of refinement steps. More steps result in higher-quality images but take longer. - Safety Checker:
Enables or disables safety checks during image generation. Set to false to generate uncensored content. - AI Model:
Specifies the model used for generating the image.
Why Use AI Image Generation in UBot Studio?
UBot Studio’s AI Image Generation feature is an incredibly versatile tool for:
- Creating custom artwork.
- Generating images for websites or presentations.
- Developing concept art quickly.
- Creating social media content.
It’s a fast, creative way to turn your ideas into reality without needing advanced design skills.
Ready to Try It?
Dive into AI image generation with UBot Studio today, and see how it can take your automation projects to the next level. Happy botting!
Code Snippet
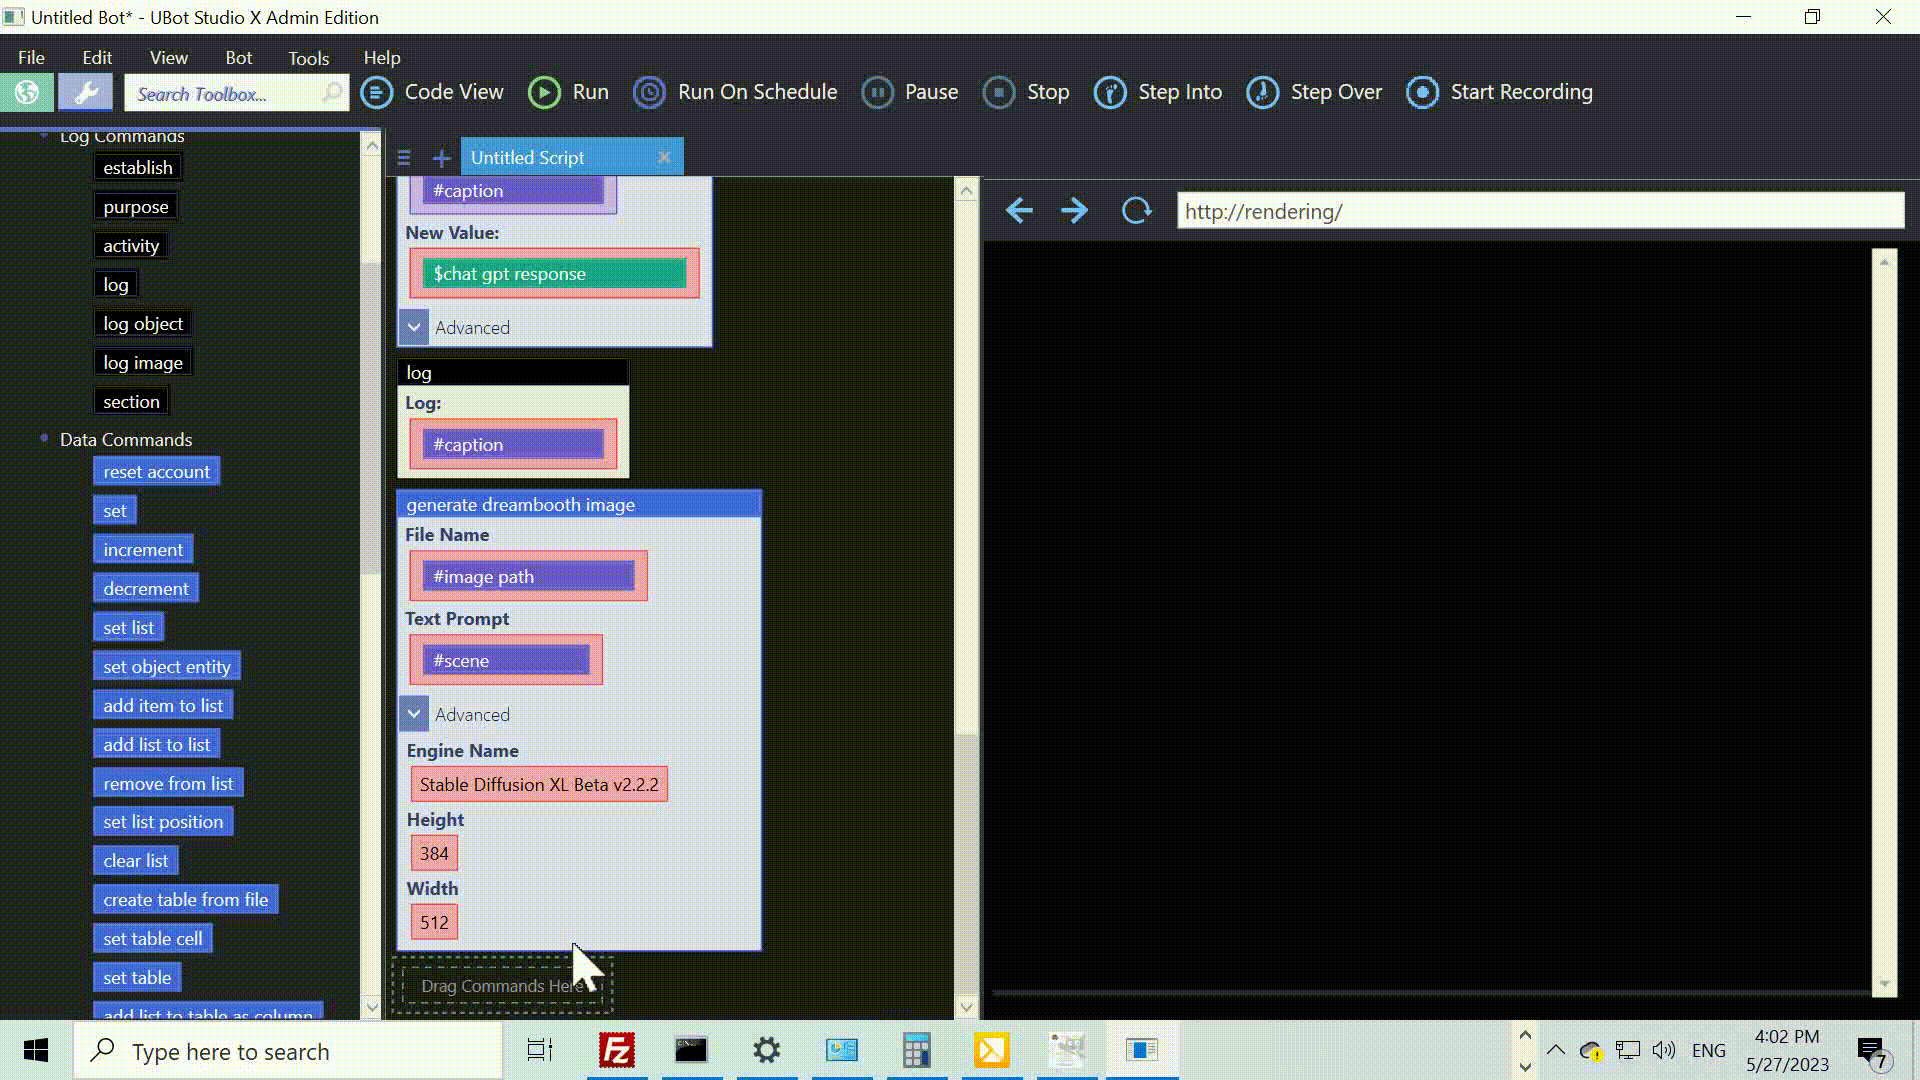
Here’s the full code snippet for generating an anime-style image:
ui console view
create ai image("a beautiful woman standing on a grassy ledge looking wistfully out over the ocean, early evening, photorealistic, beautiful, masterpiece, highest quality, professional photography, HDR ANIME STYLE",
"%documents%\\UBot Studio\\AI Creations\\output.png",
"https://civitai.com/api/download/models/1085432?type=Model&format=SafeTensor", 1, "9:16", 3.5, 28, "False", "Flux 1 Dev")
log image("%documents%\\UBot Studio\\AI Creations\\output.png", 50)