UBot Studio Unleashes AI Power for Irresistible YouTube Titles and Descriptions!
Unite your passion with AI technology, and together you will weave a tapestry of captivating content, touching the hearts of your audience and igniting a spark that transcends the boundaries of human creativity.
AI is improving at a pace that leaves my head spinning, and bots are getting smarter and smarter. Today, we’re going to harness the power of cutting edge AI technology and teach a bot how to manage your YouTube channel. This tutorial will guide you through the process of connecting to YouTube, and using the impressive capabilities of ChatGPT, the latest in AI driven language models, to generate captivating titles and descriptions for your videos. By integrating these advanced features into your YouTube strategy, you’ll save considerable time and effort while elevating your content and enhancing audience engagement. Alright, let’s get into it.
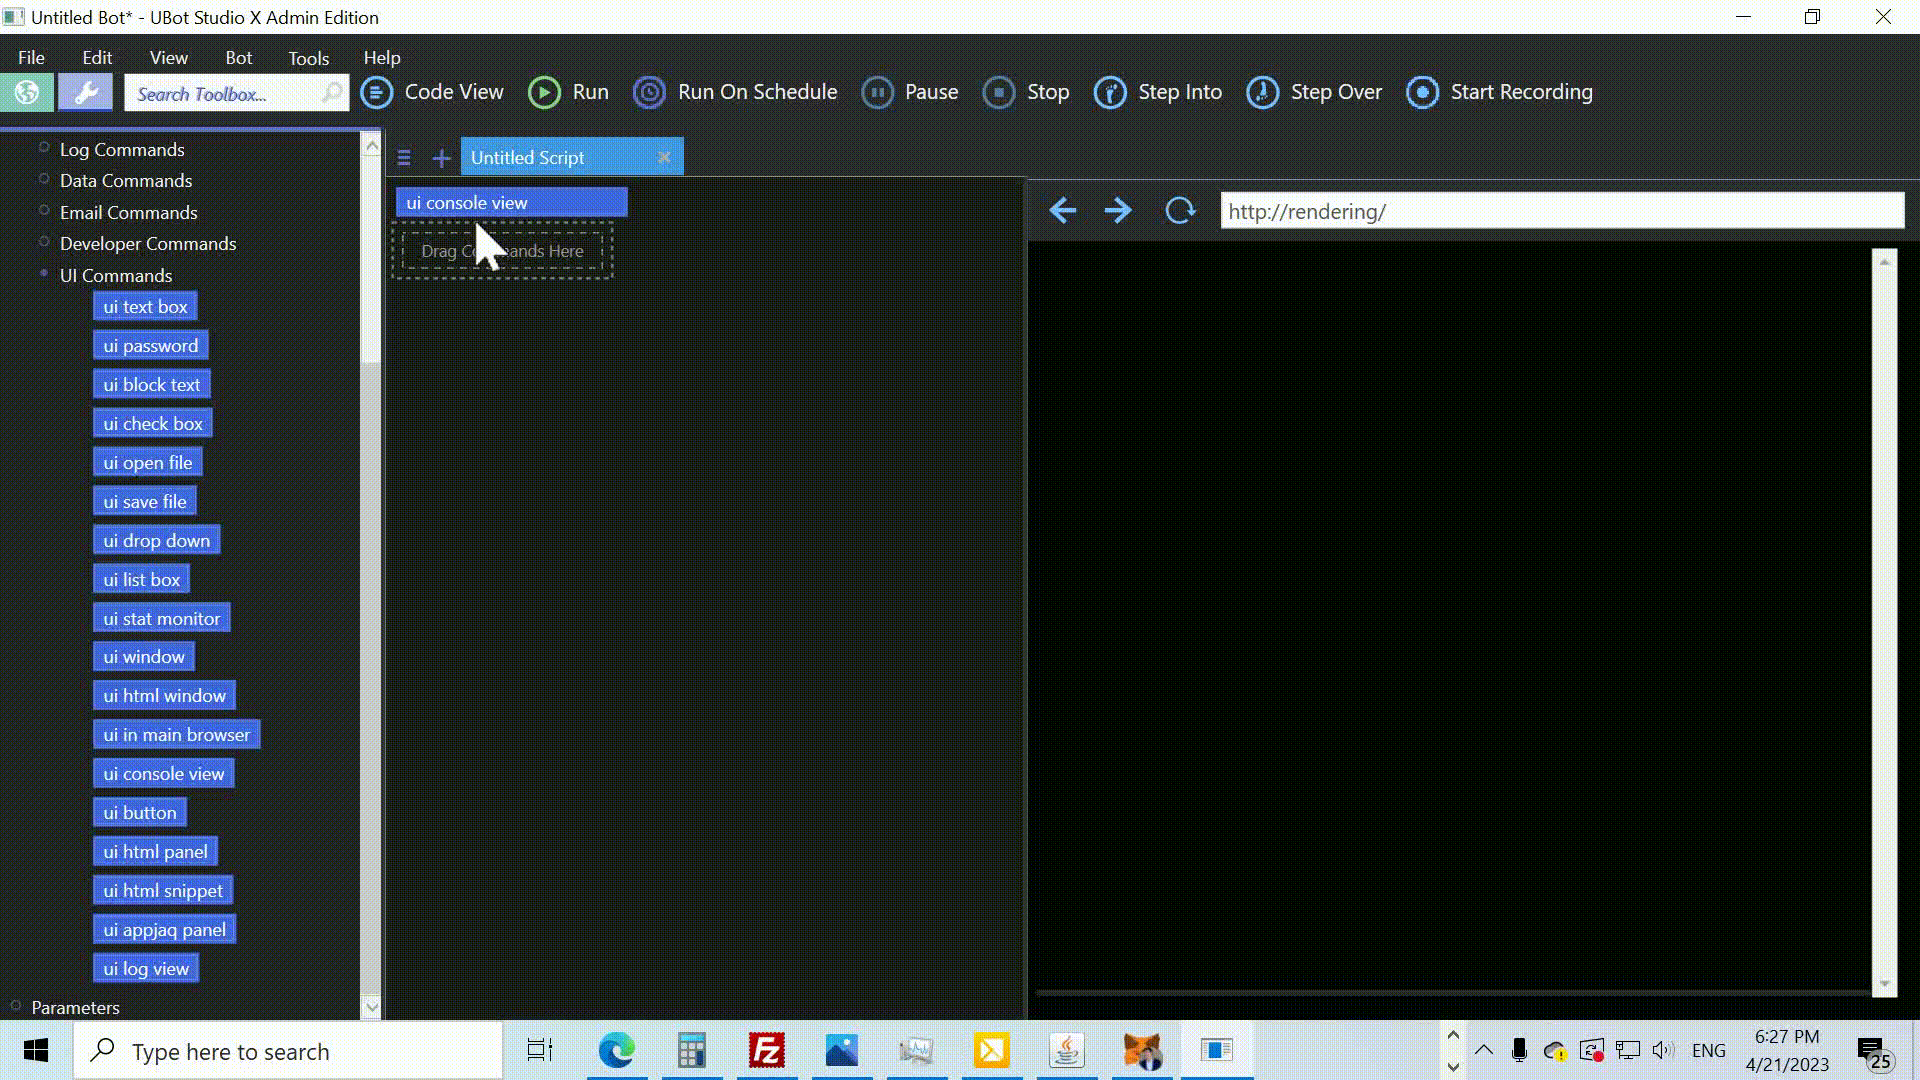
First, let’s start by setting up the ui console view . This command creates a simple console interface for our script. To do this, find the ui console view command in the toolbox and drag it into the script window.
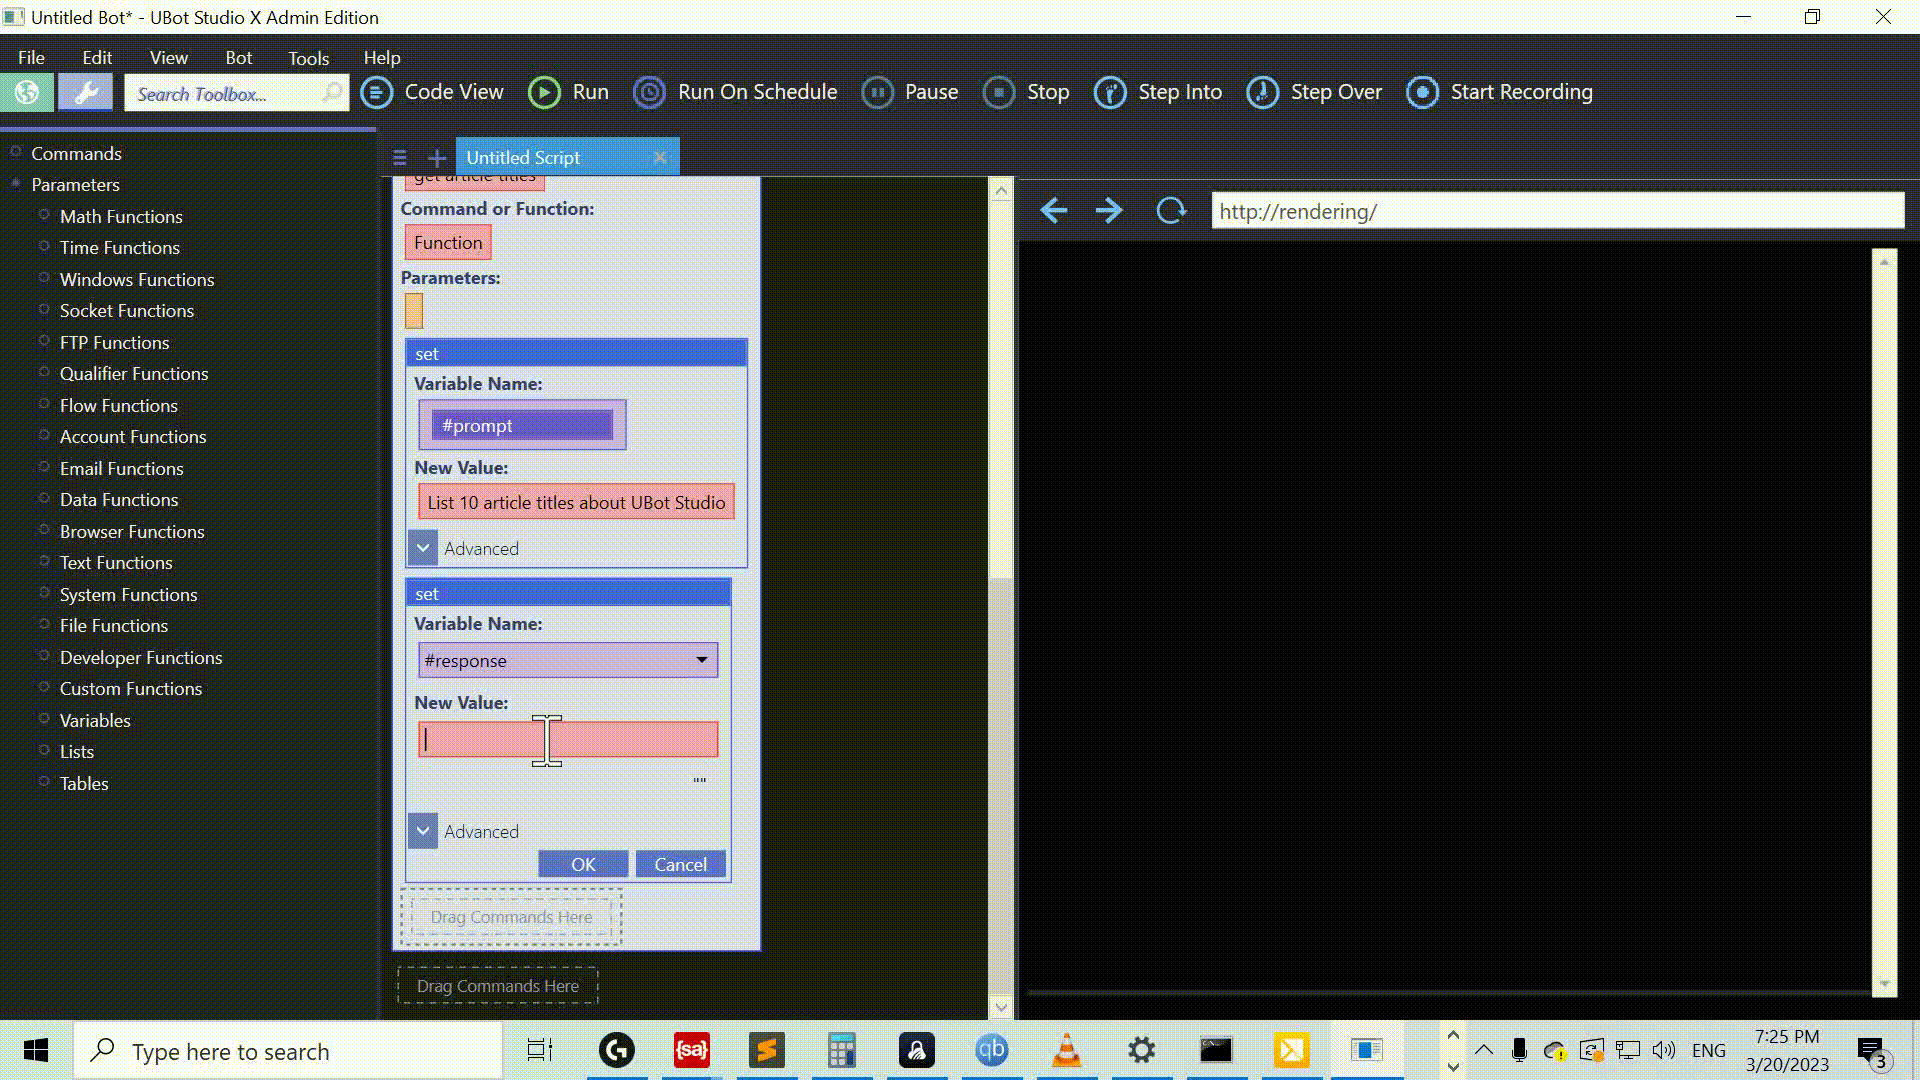
Next, we need to configure the OpenAI api with the config openai command.
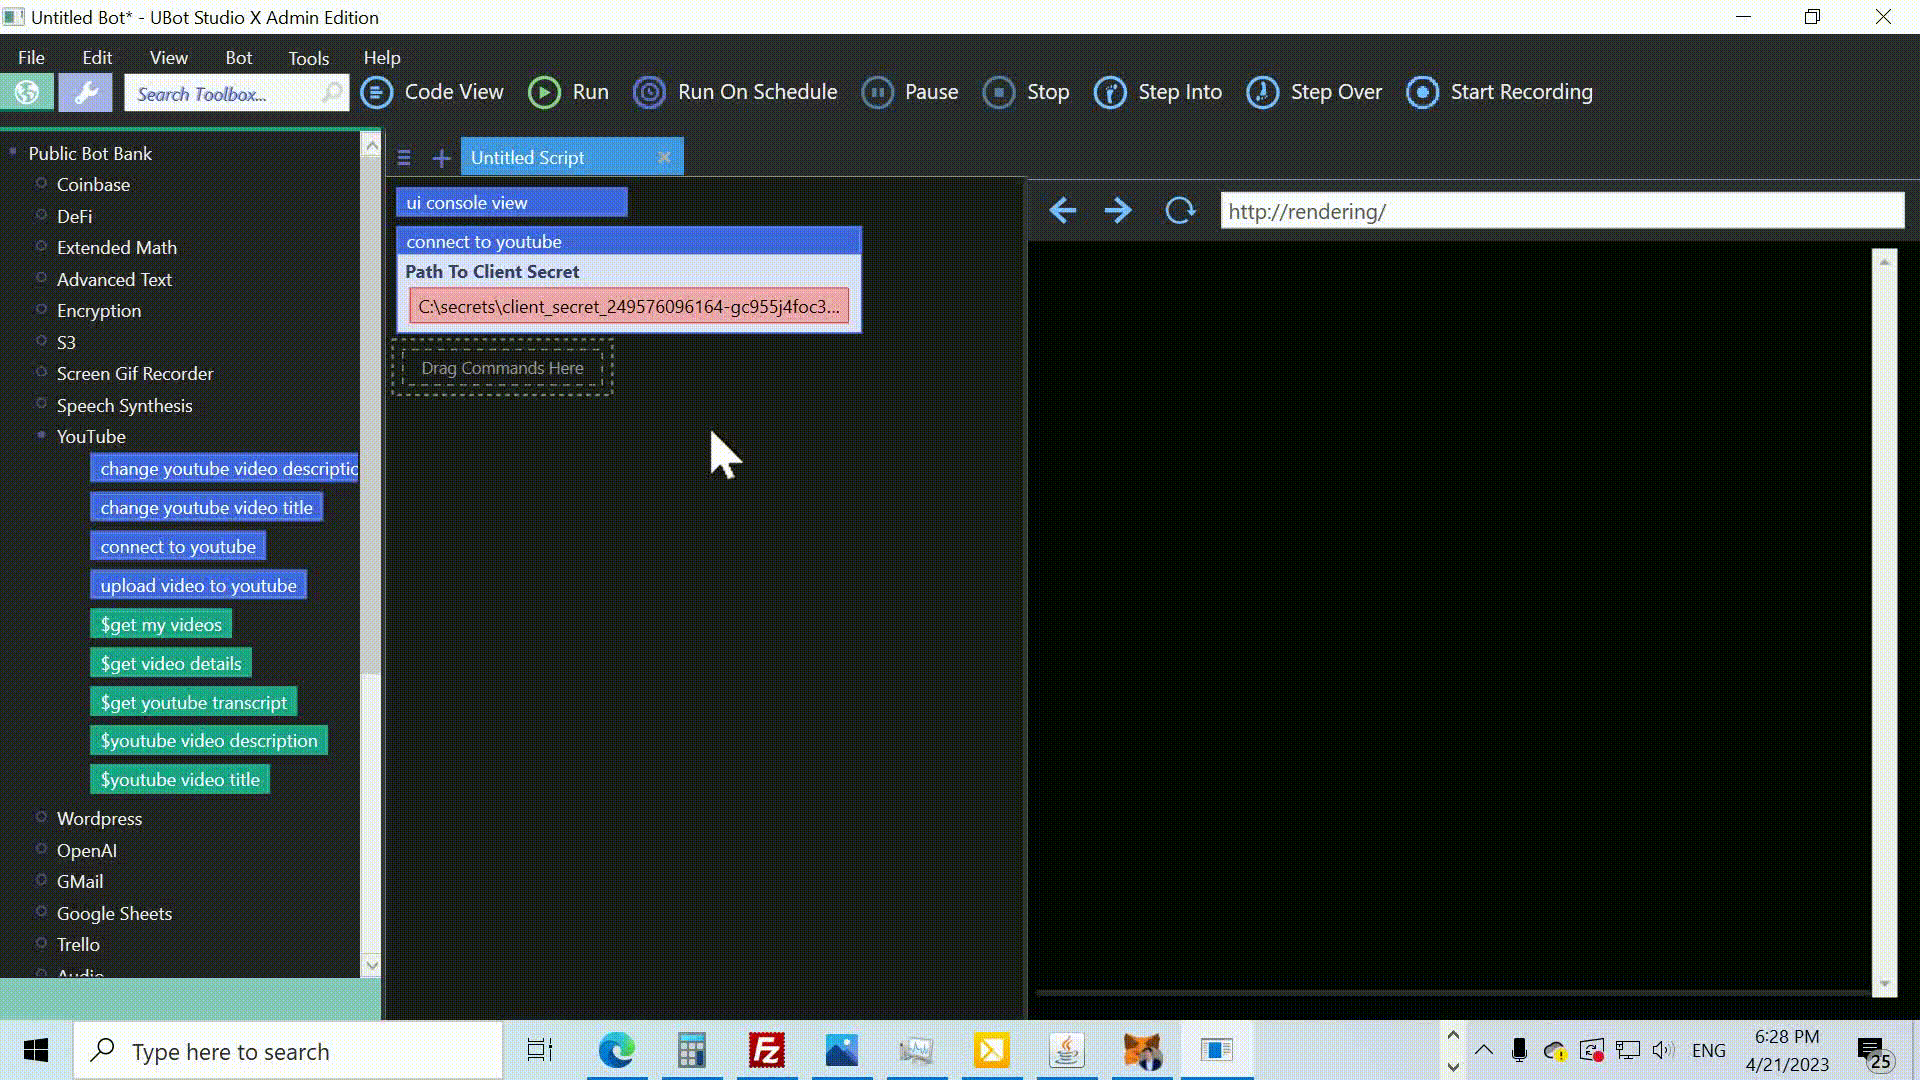
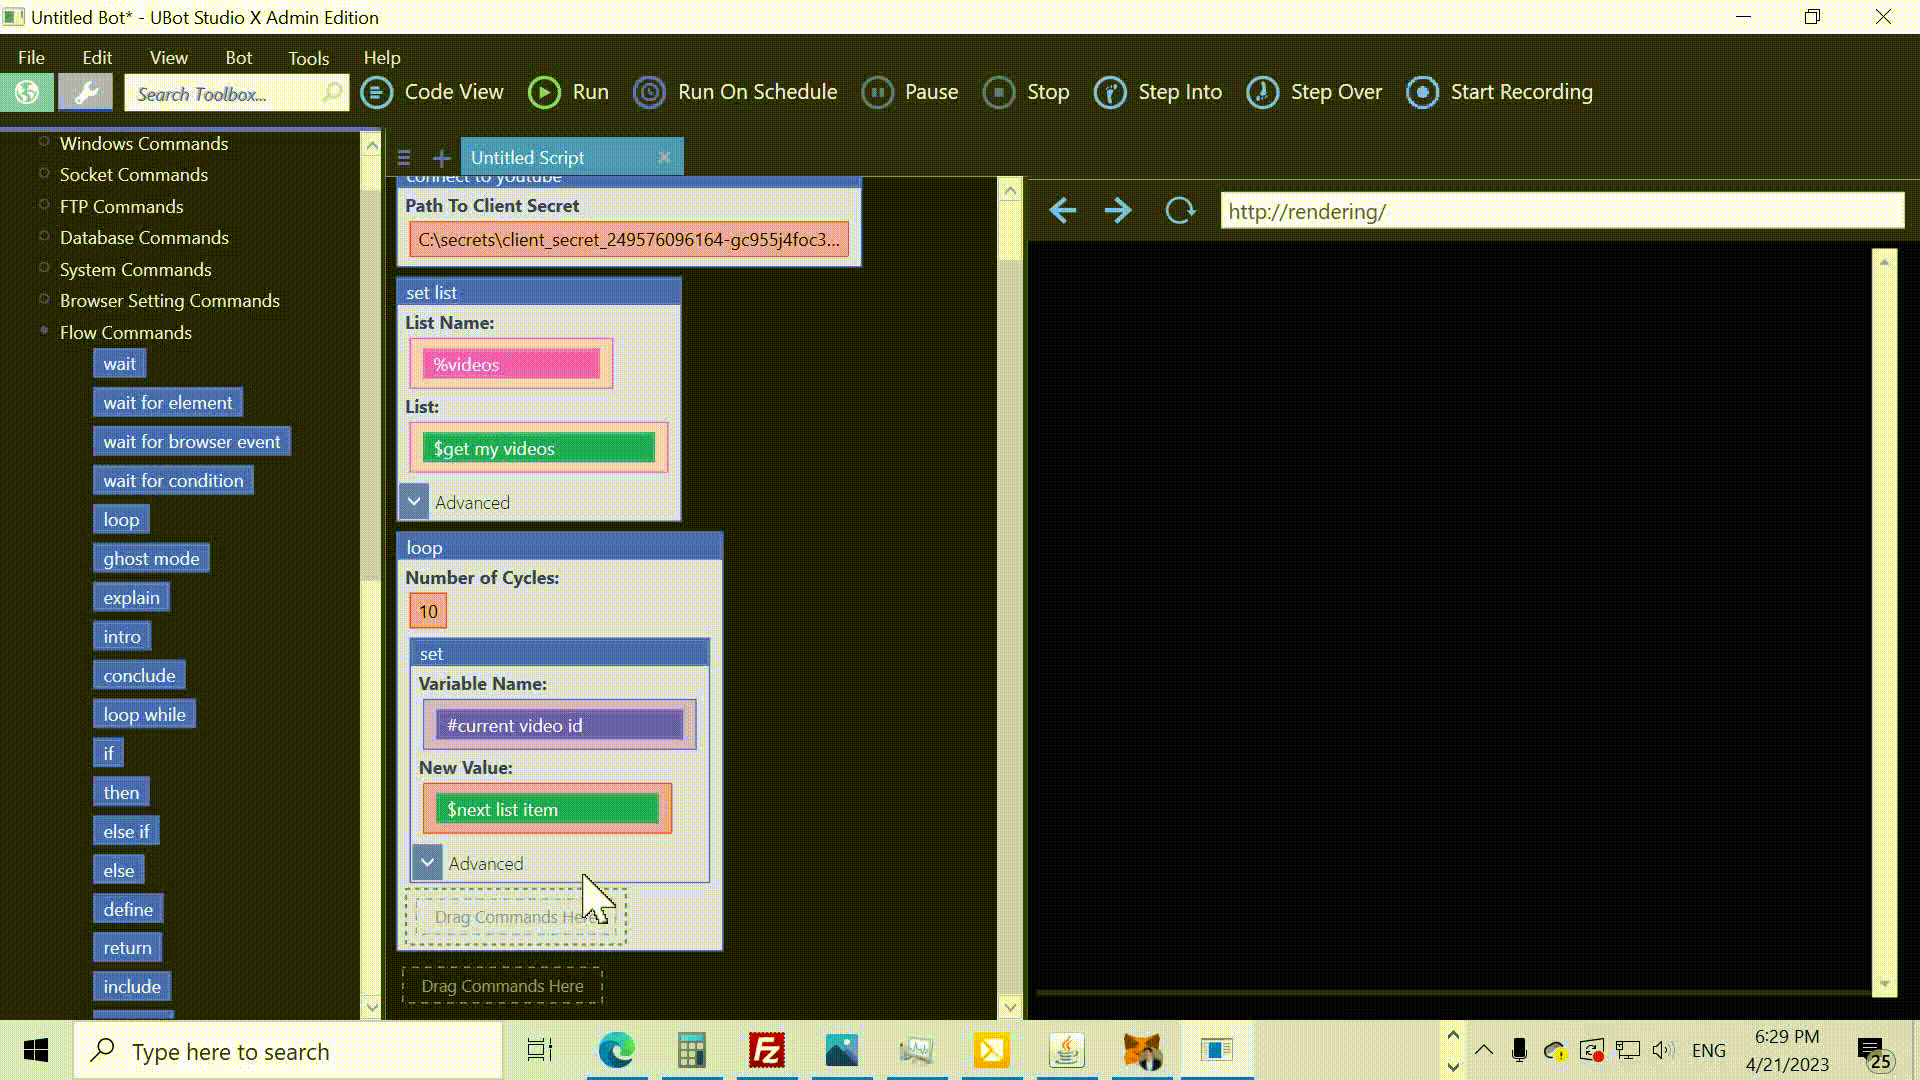
After that, we need to establish a connection to YouTube.
As a parameter, provide the path to your “client secrets” file. This file comes from the Google Developer Console. I’ll explain how to do all this in another tutorial.
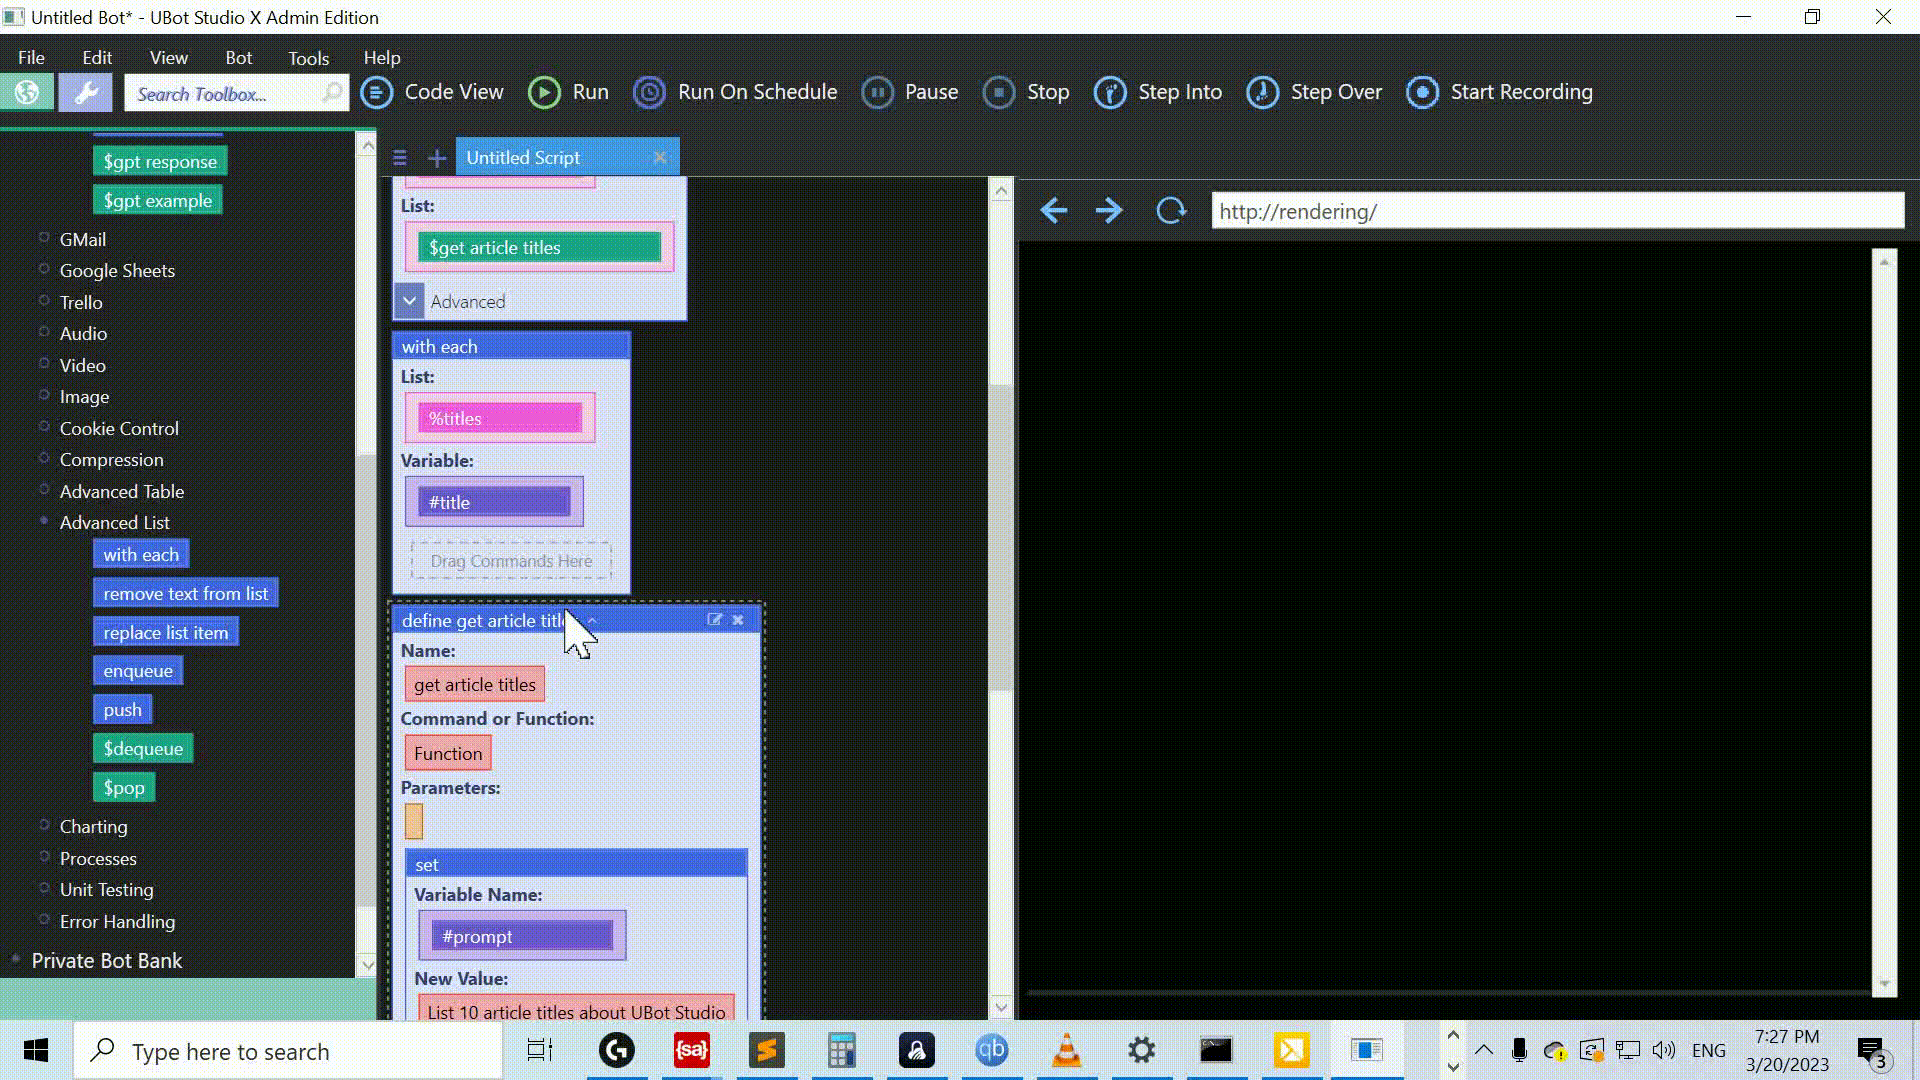
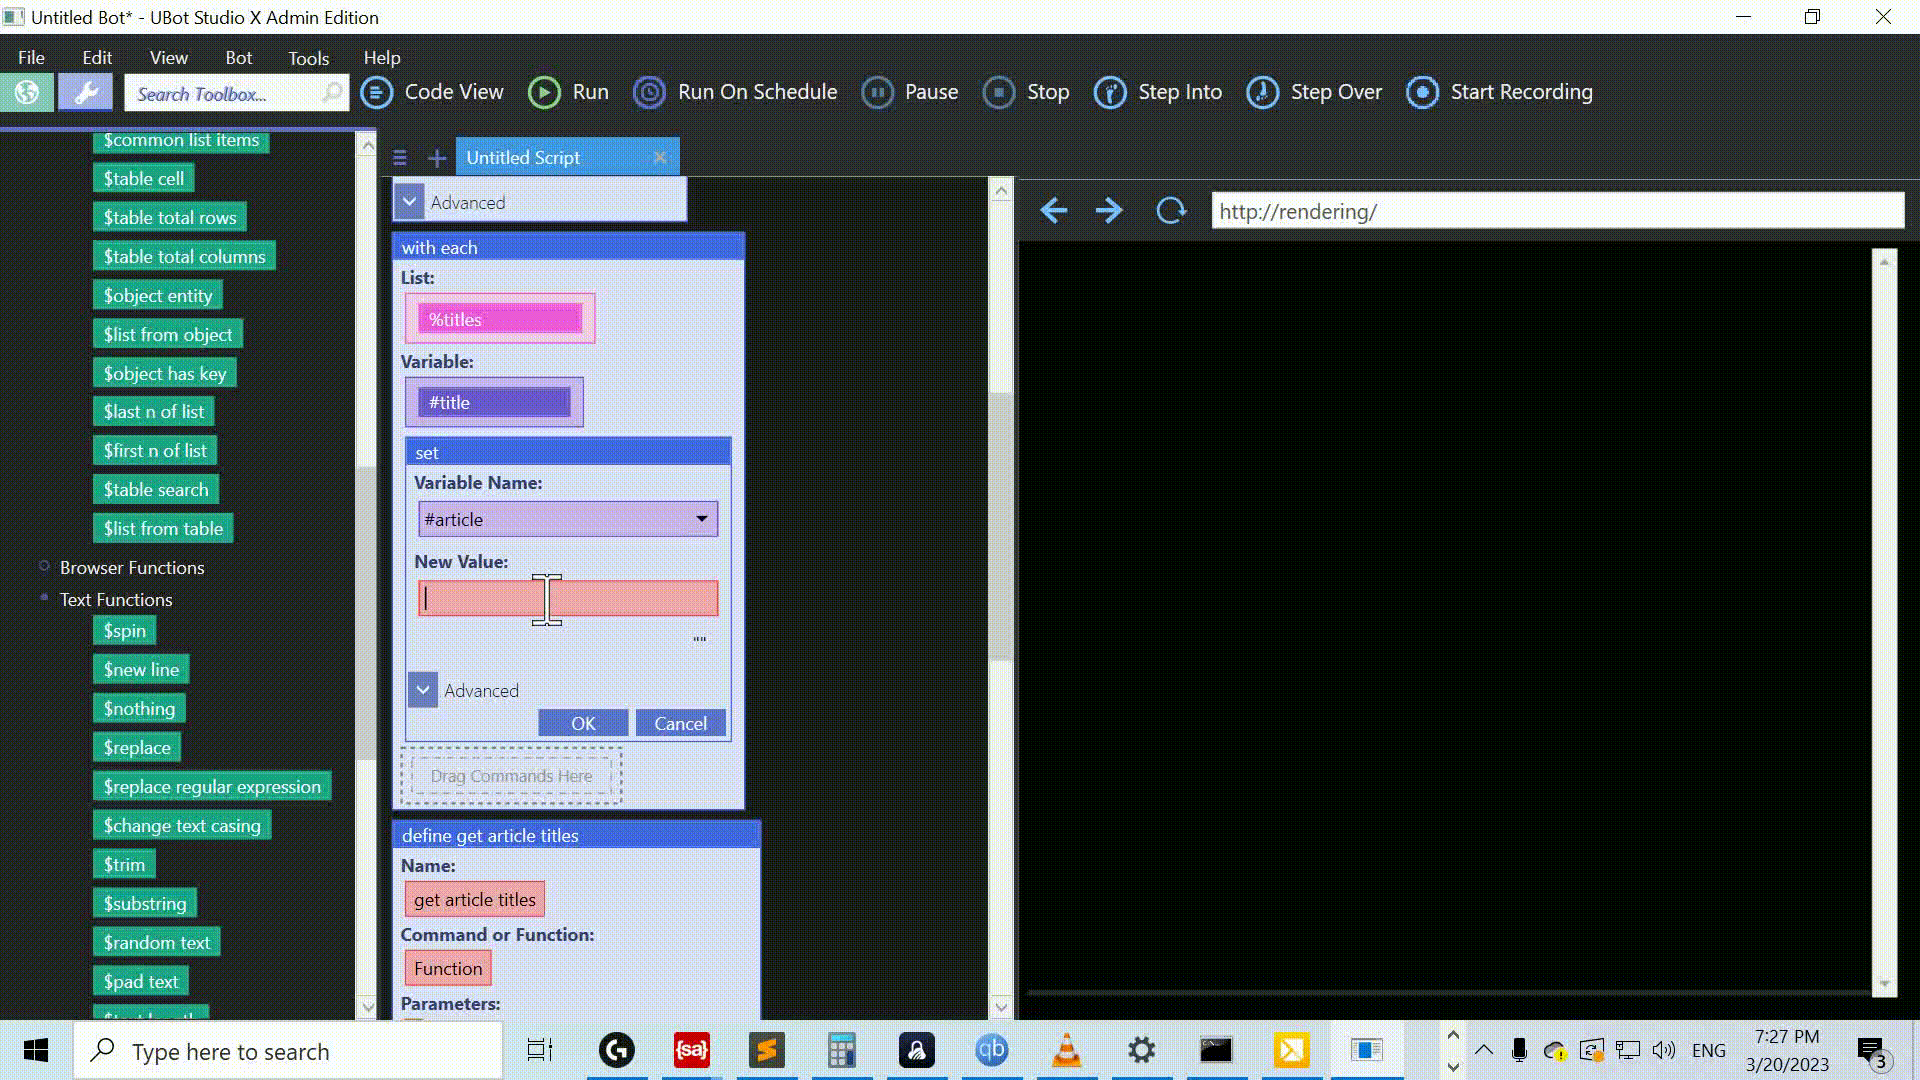
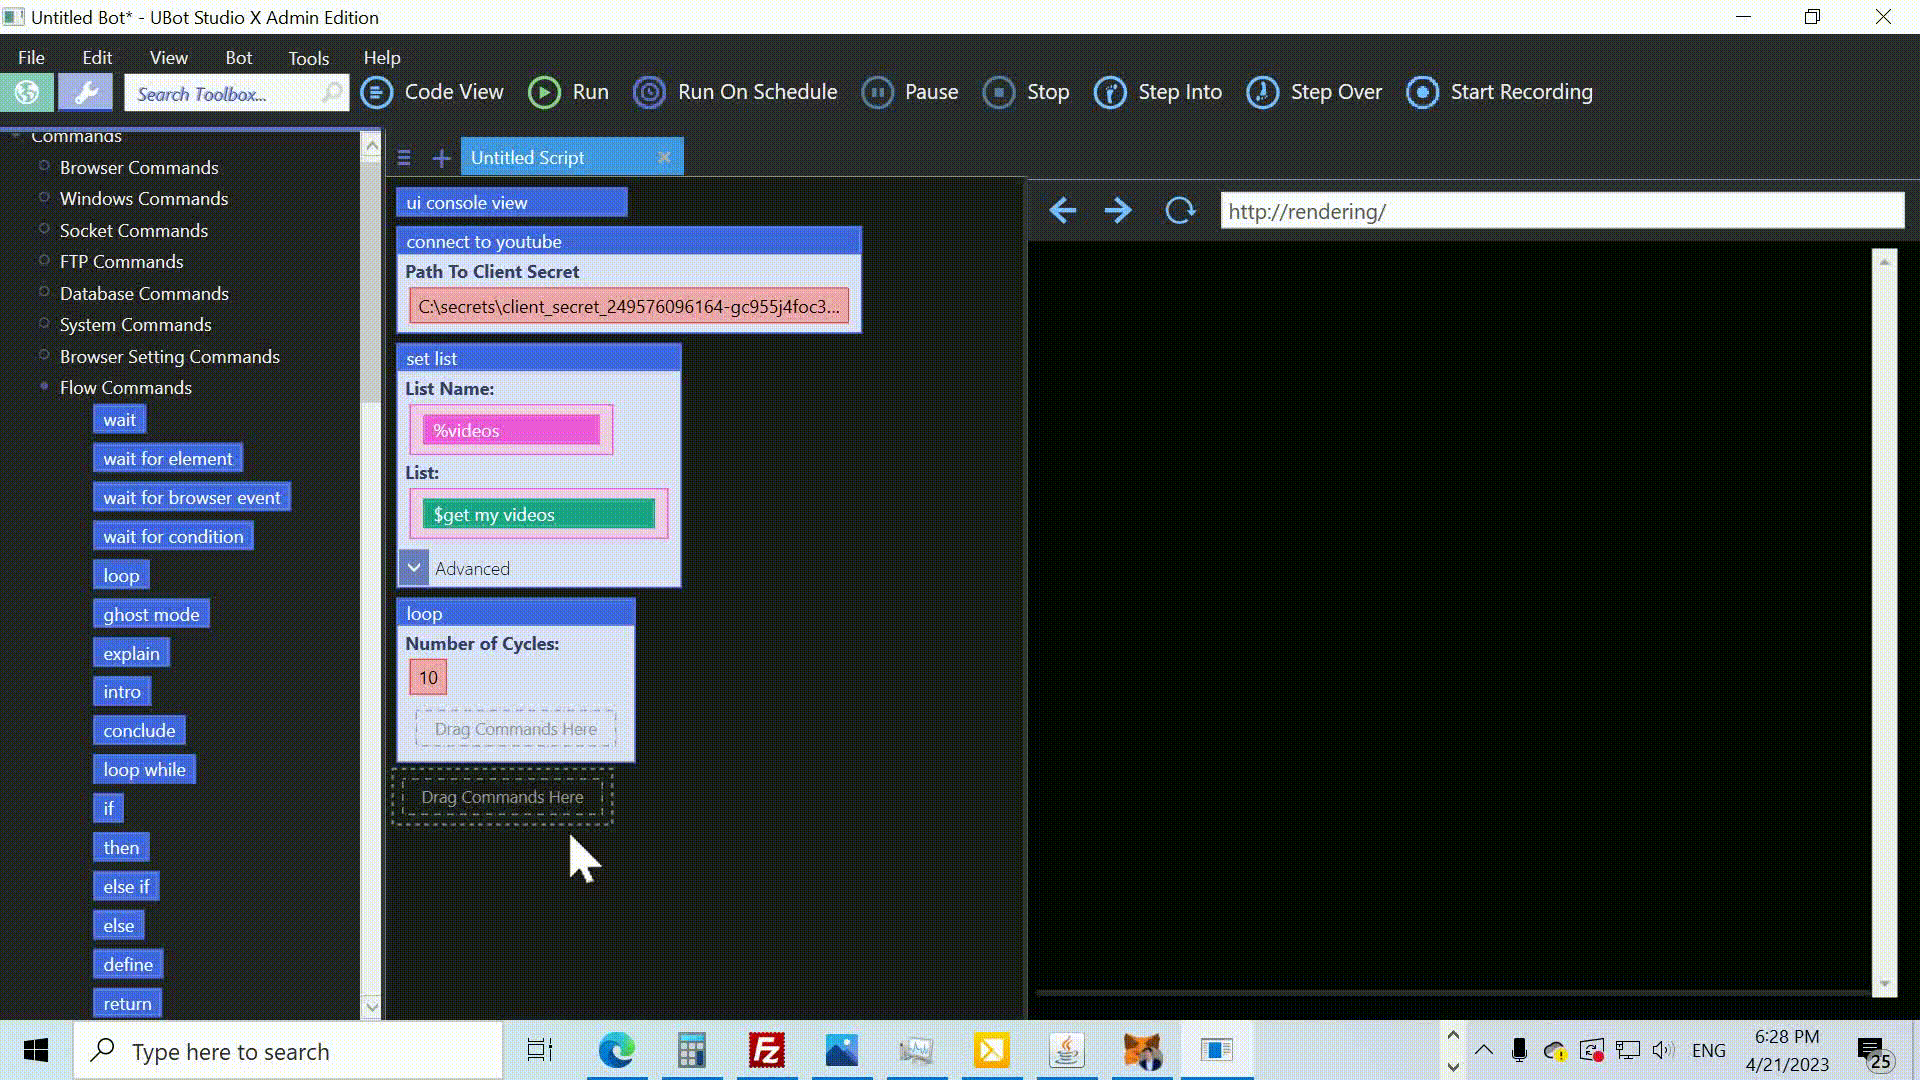
Now, let’s retrieve your YouTube videos. Drag the set command into the script window and create a list called %videos.
Use the $get my videos function to fetch the videos and store them in the list.
The fun part begins! We’ll loop through the top 10 videos and generate new clickbait titles and descriptions for them. To do this, drag the loop command from the toolbox and set its parameter to 10.
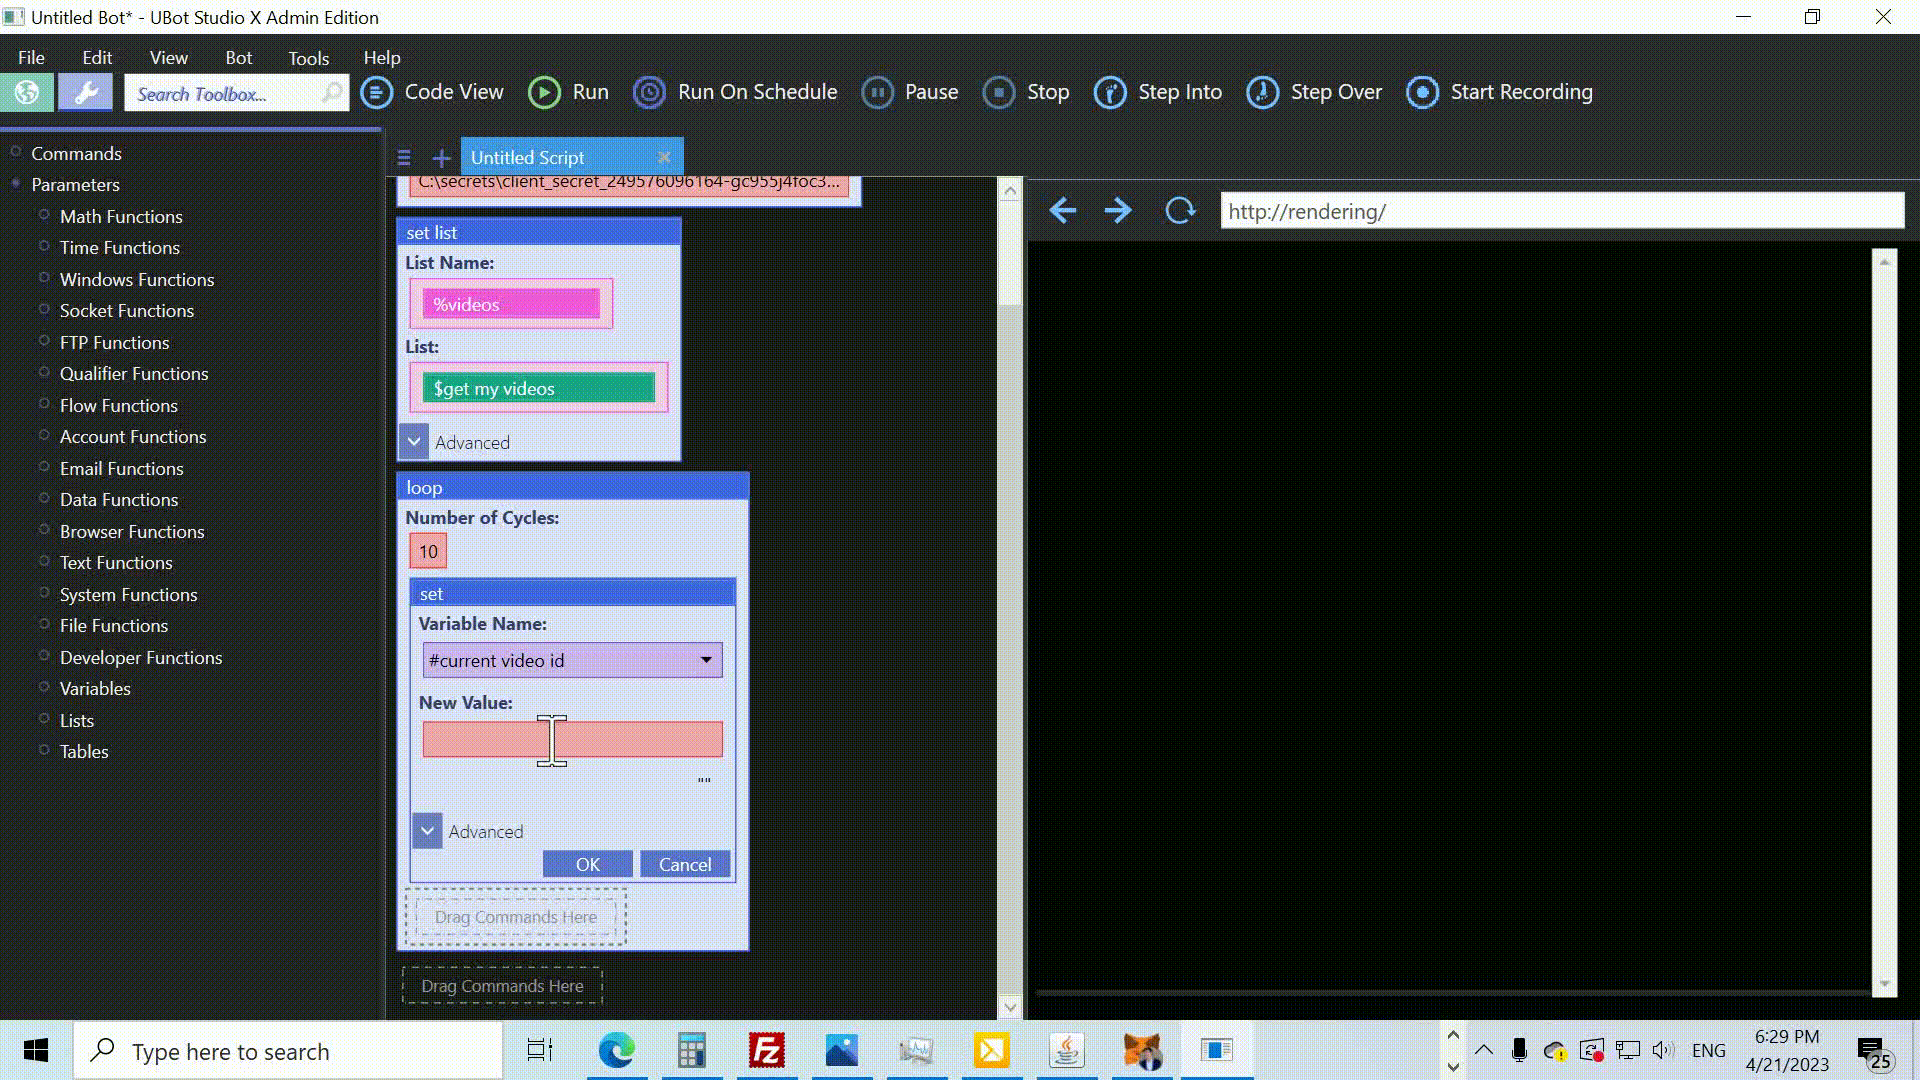
Inside the loop, we’ll first get the video ID of the current video and set it to a variable.
Create a variable called #current video id and use the $next list item function to fetch the next video ID from the list %videos .
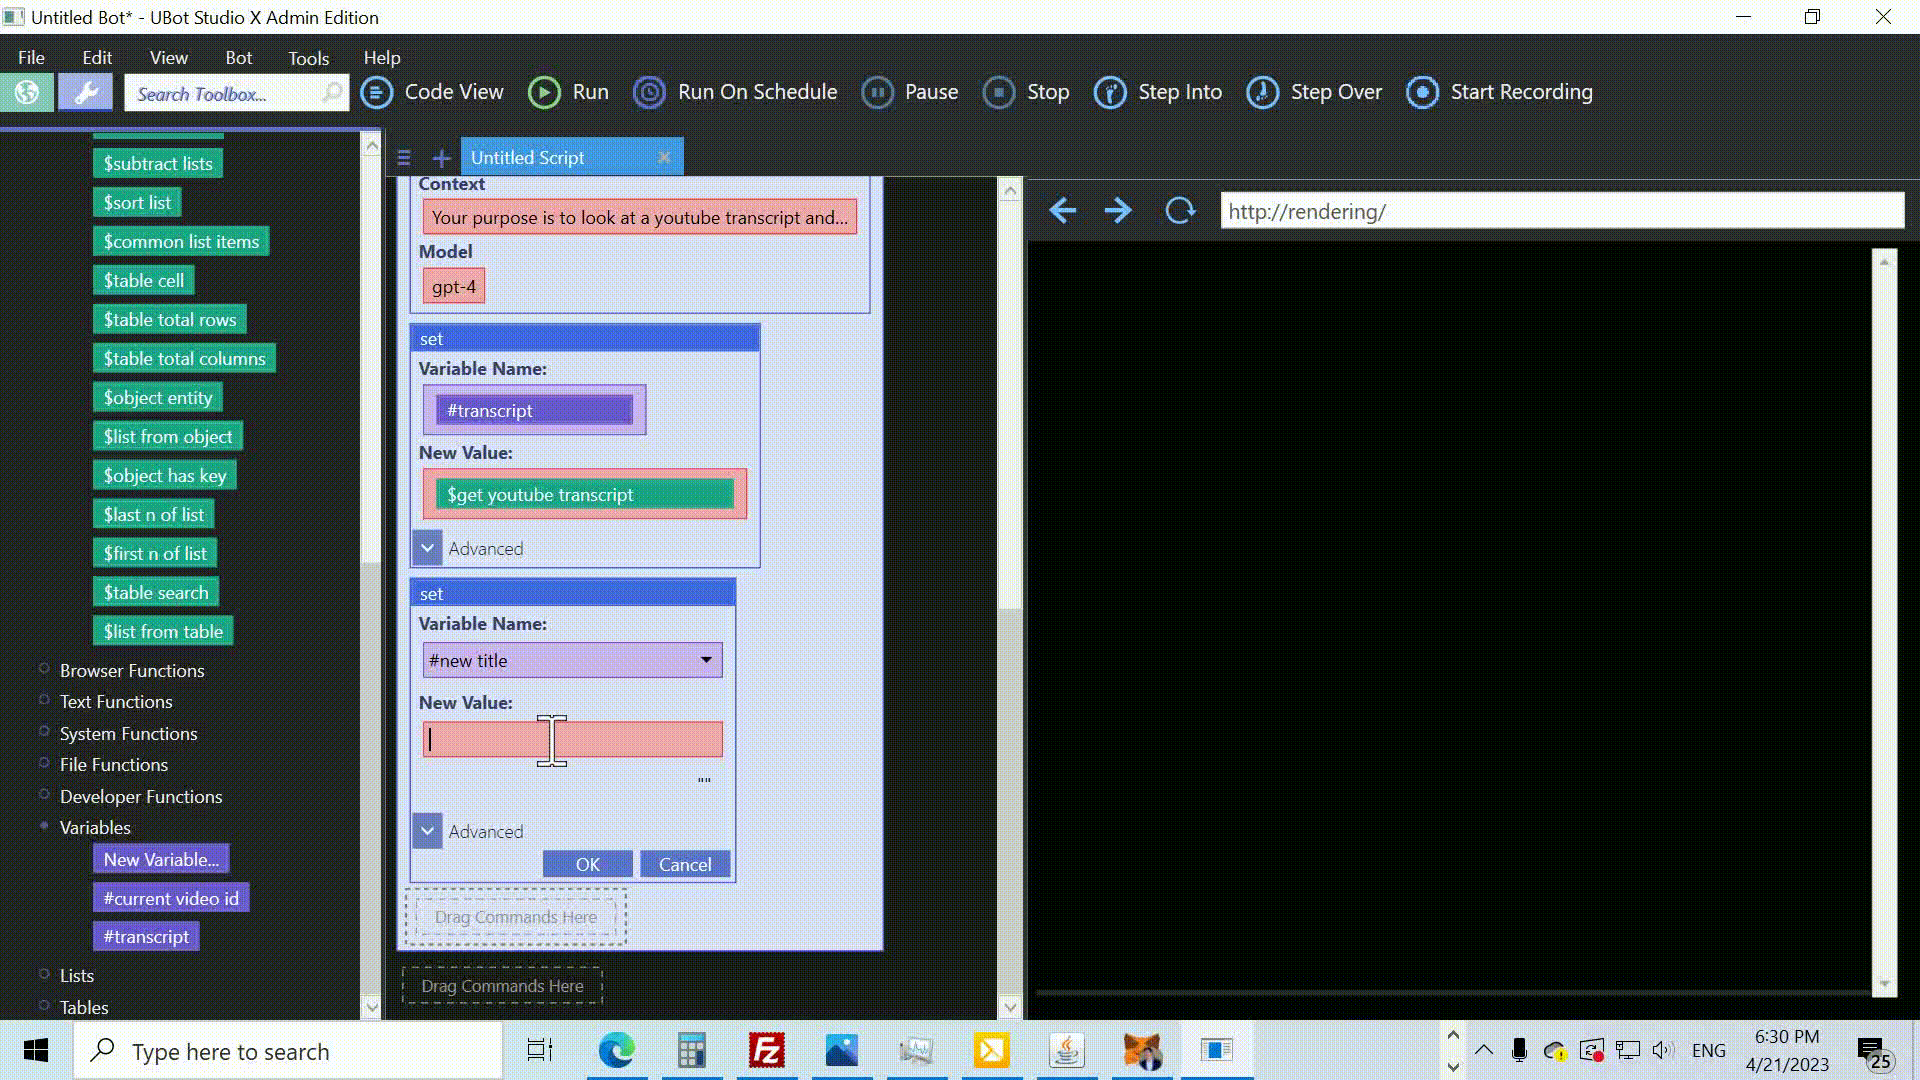
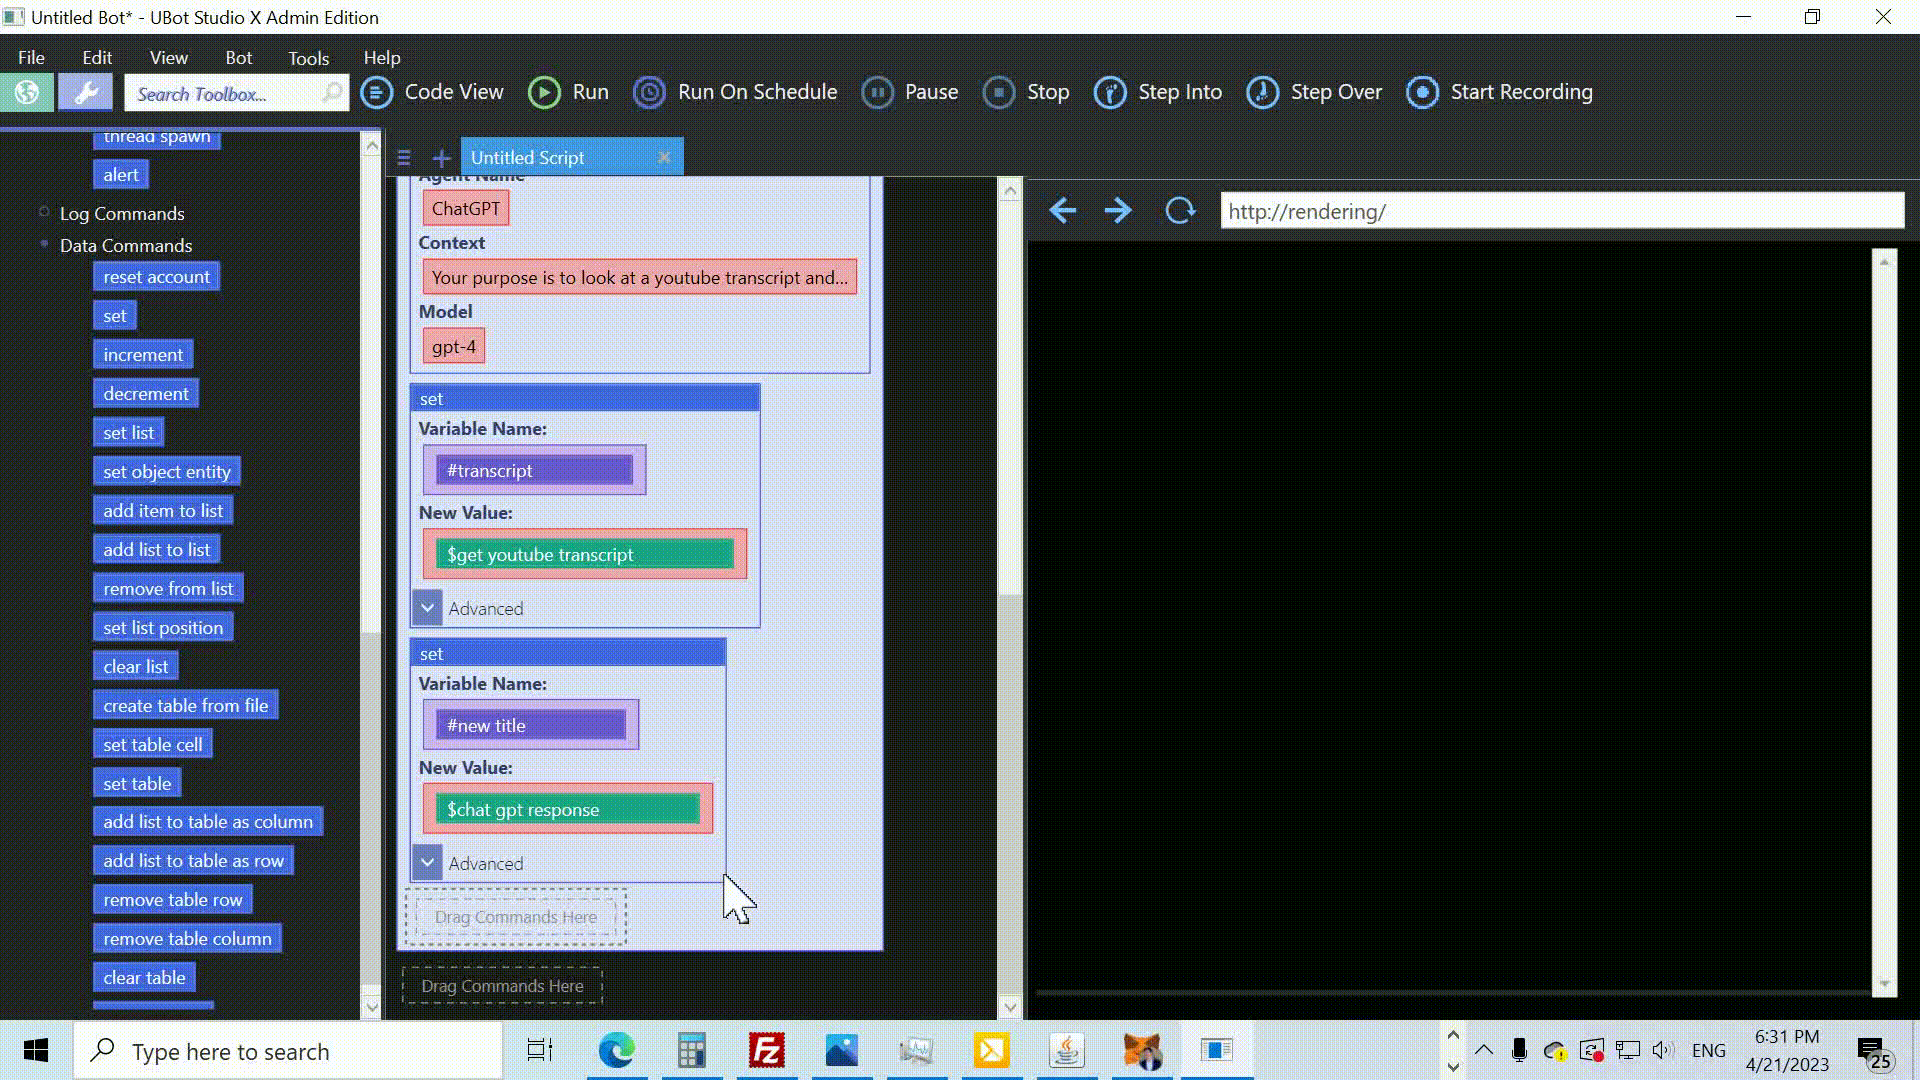
Now, we’ll create a ChatGPT agent to help us generate new titles and descriptions. Drag the create chat gpt agent command into the script window and provide three parameters: the agent’s default name “ChatGPT” is fine, we’ll set its purpose, and the GPT model will be “gpt-4”.
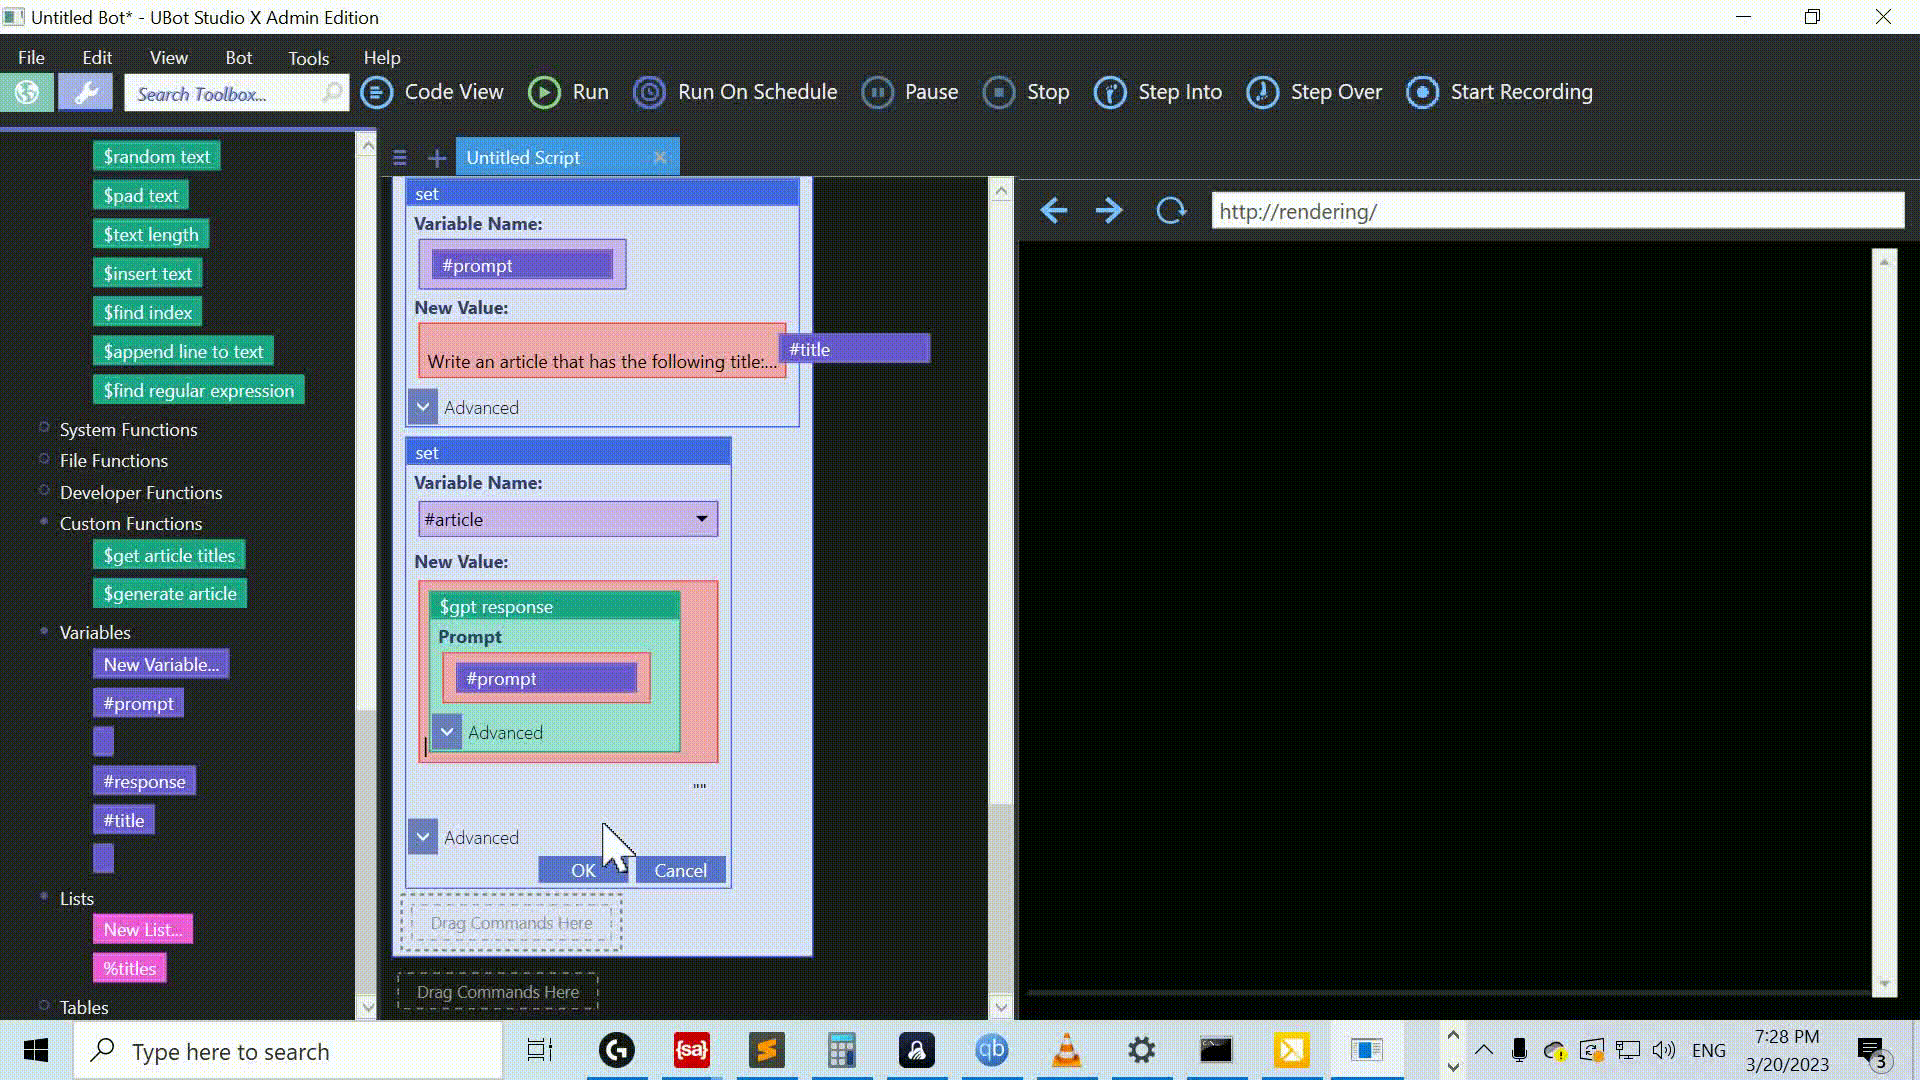
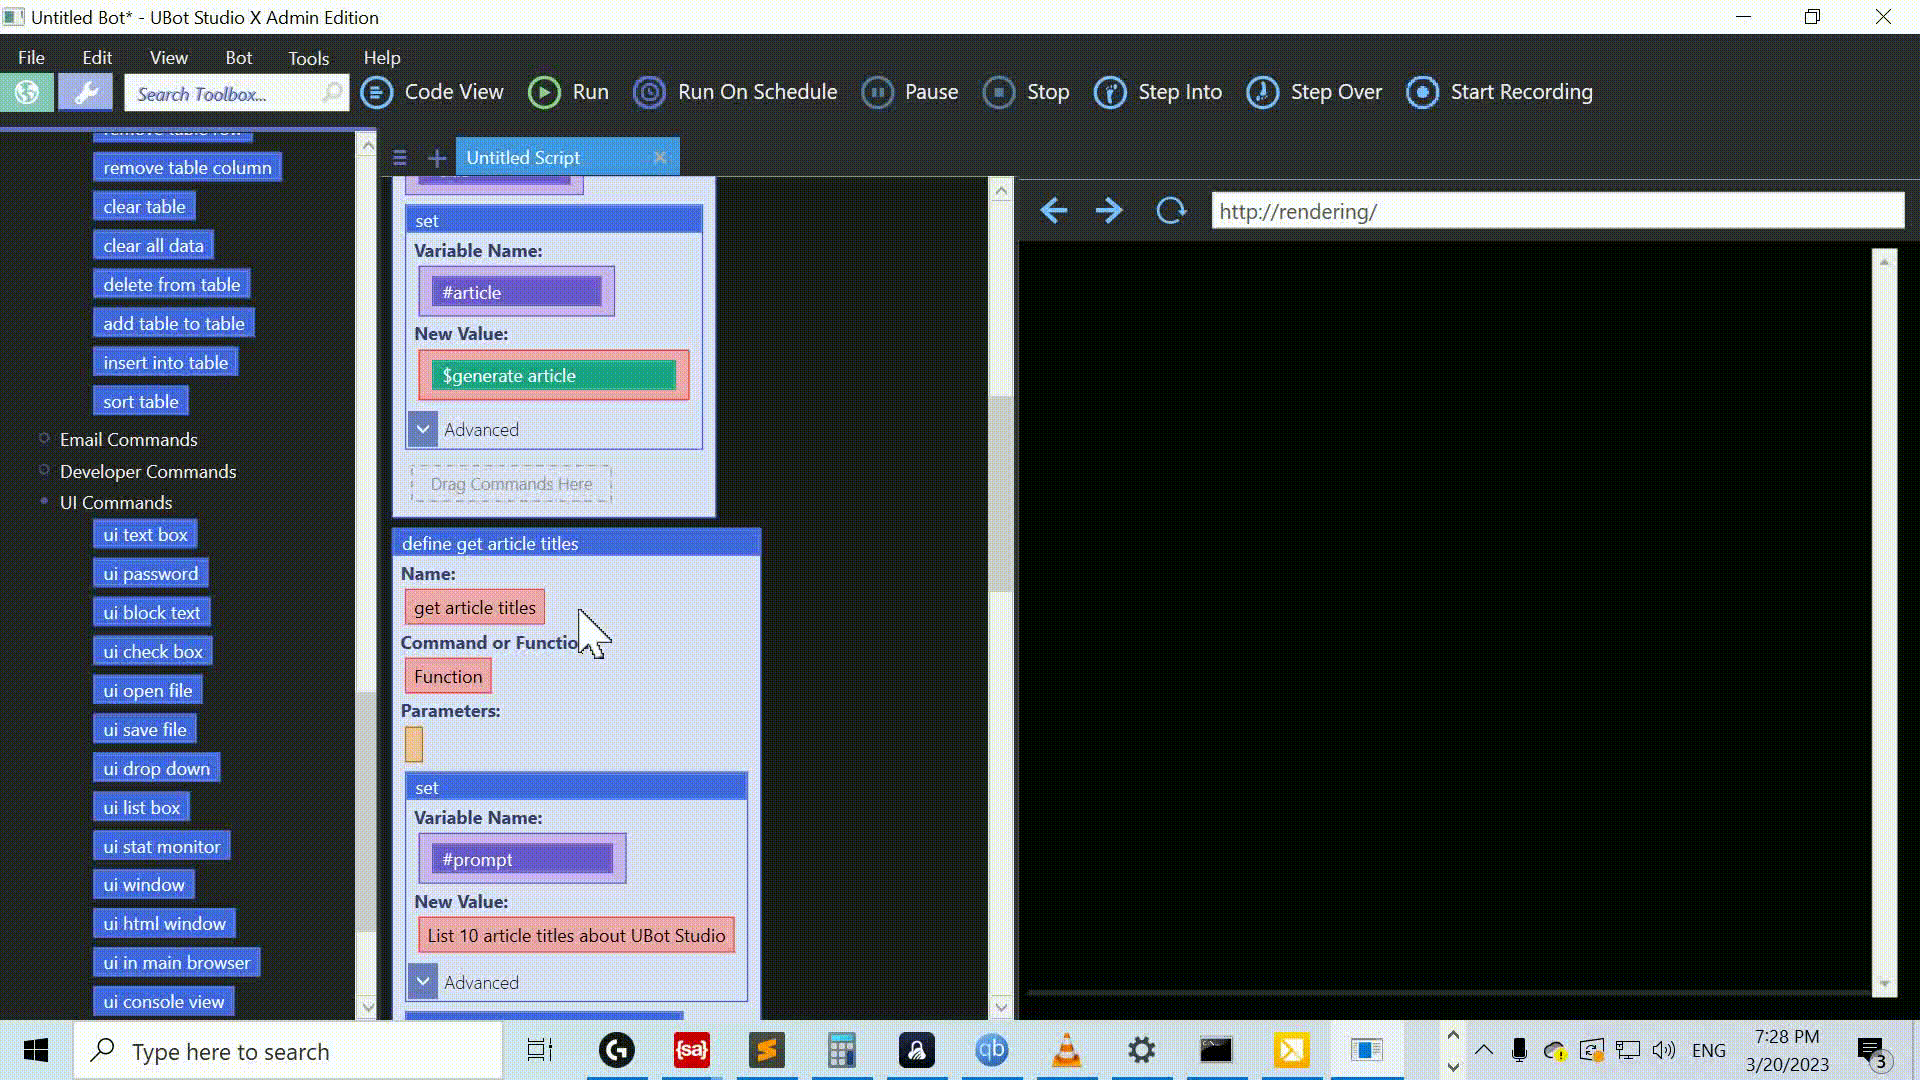
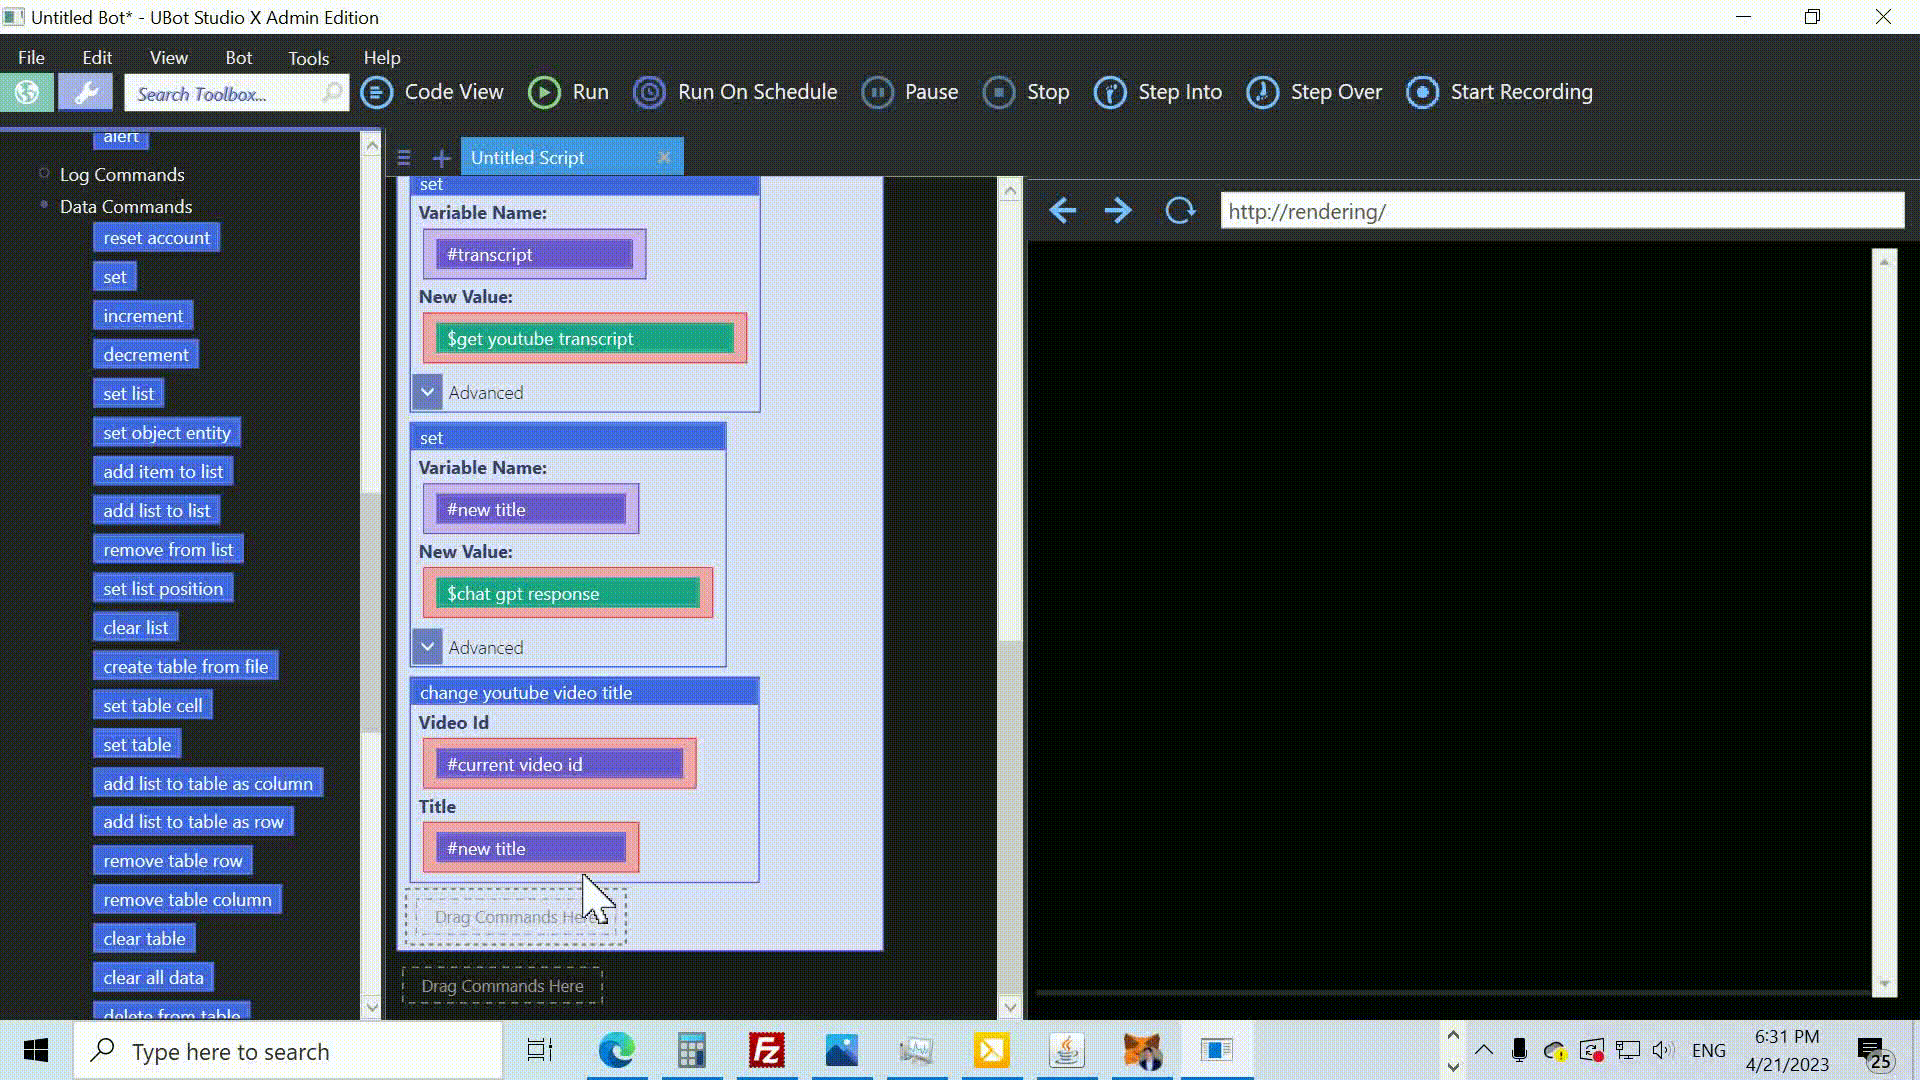
Next, we need to fetch the transcript of the current video. Use the set command to create a variable called #transcript and the $get youtube transcript function to obtain the transcript for the video ID.
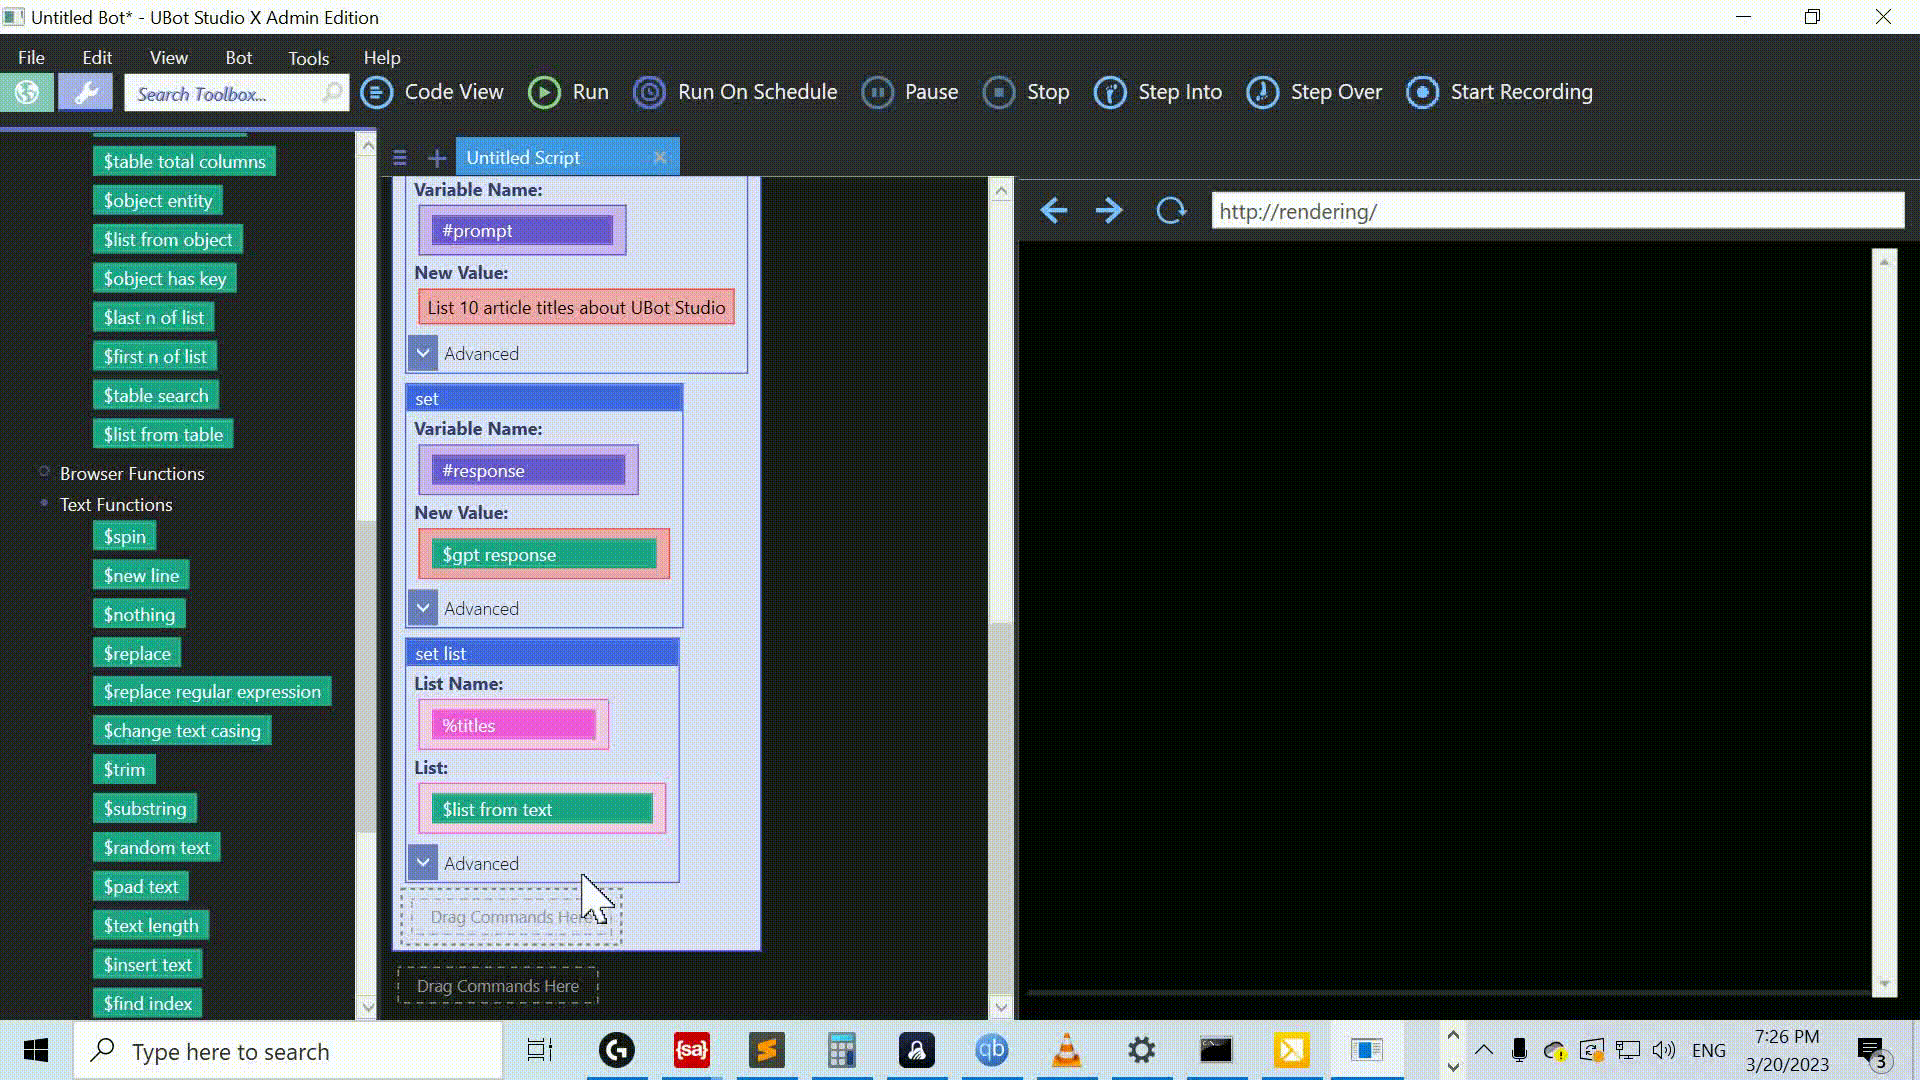
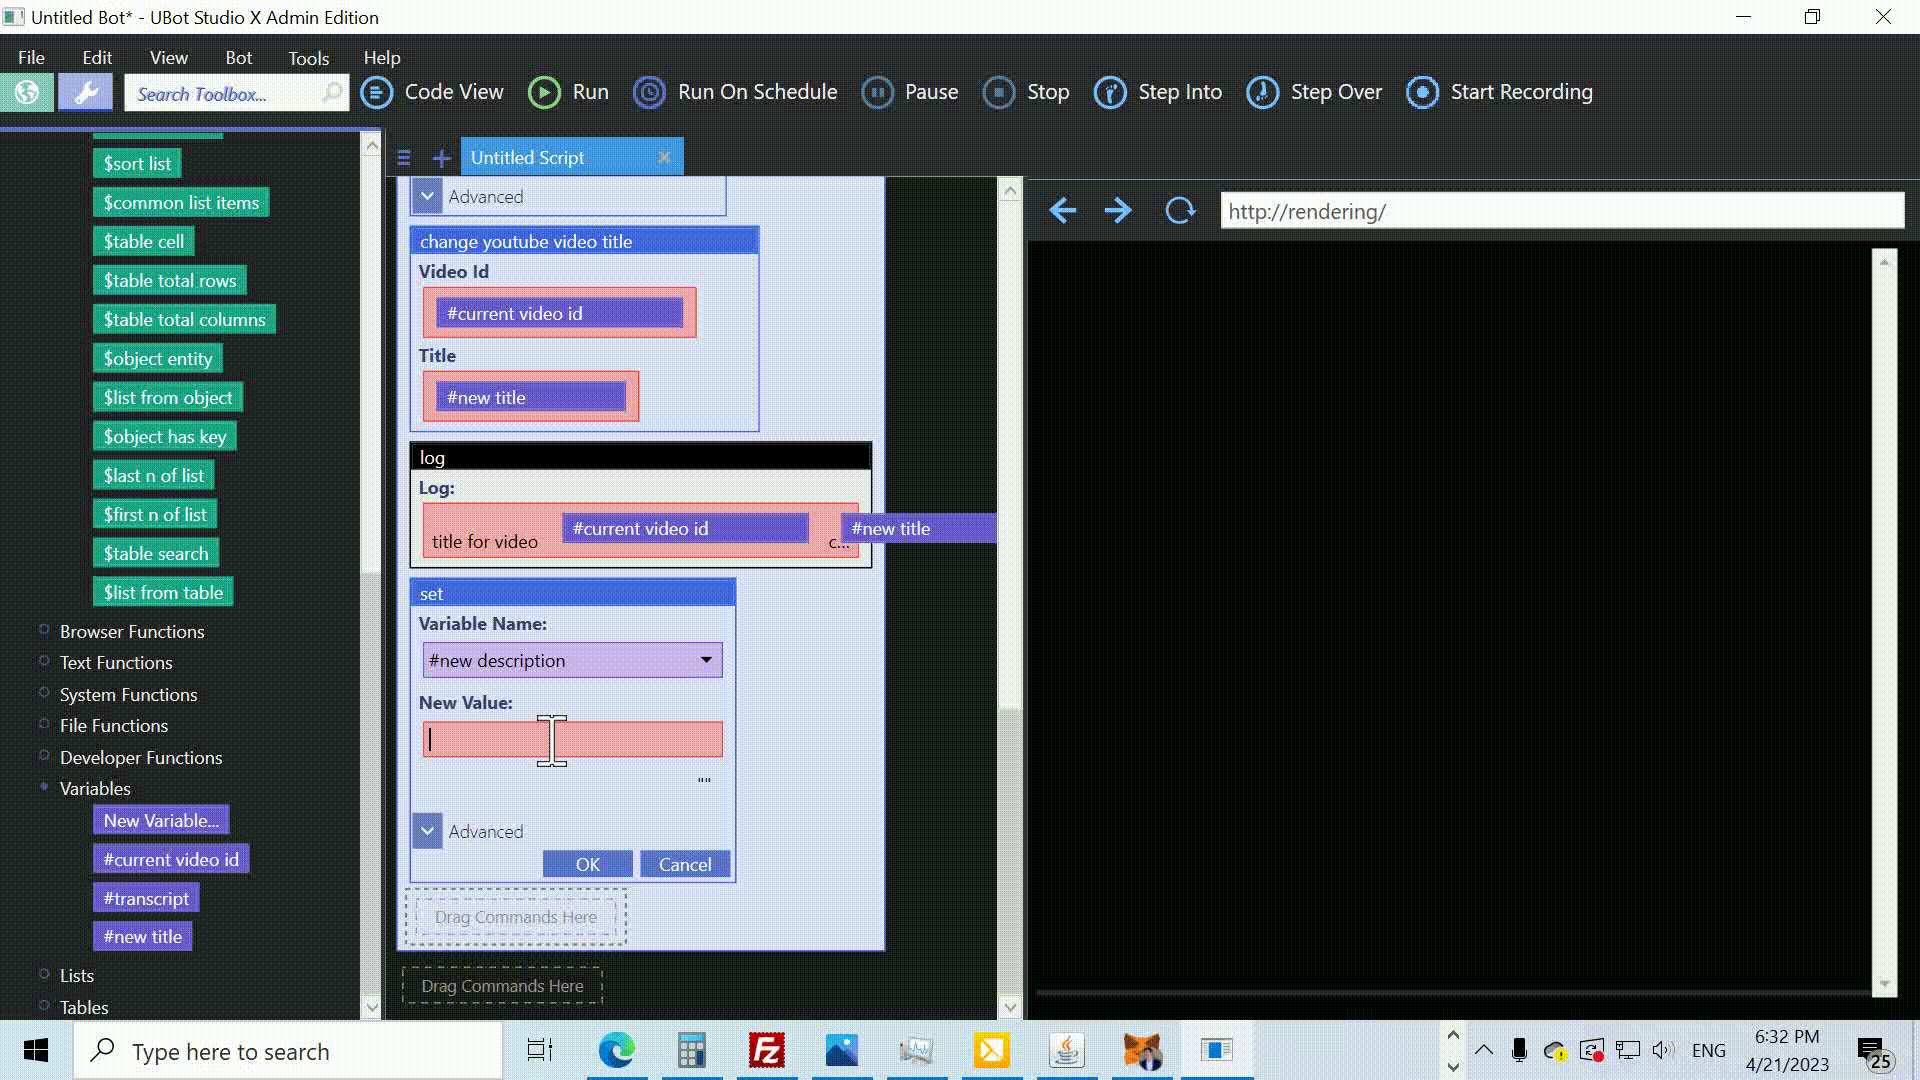
Time to generate a clickbait title! Use the set command again to create a variable called #new title. Then, call the $chat gpt response function and provide the transcript as part of the input.
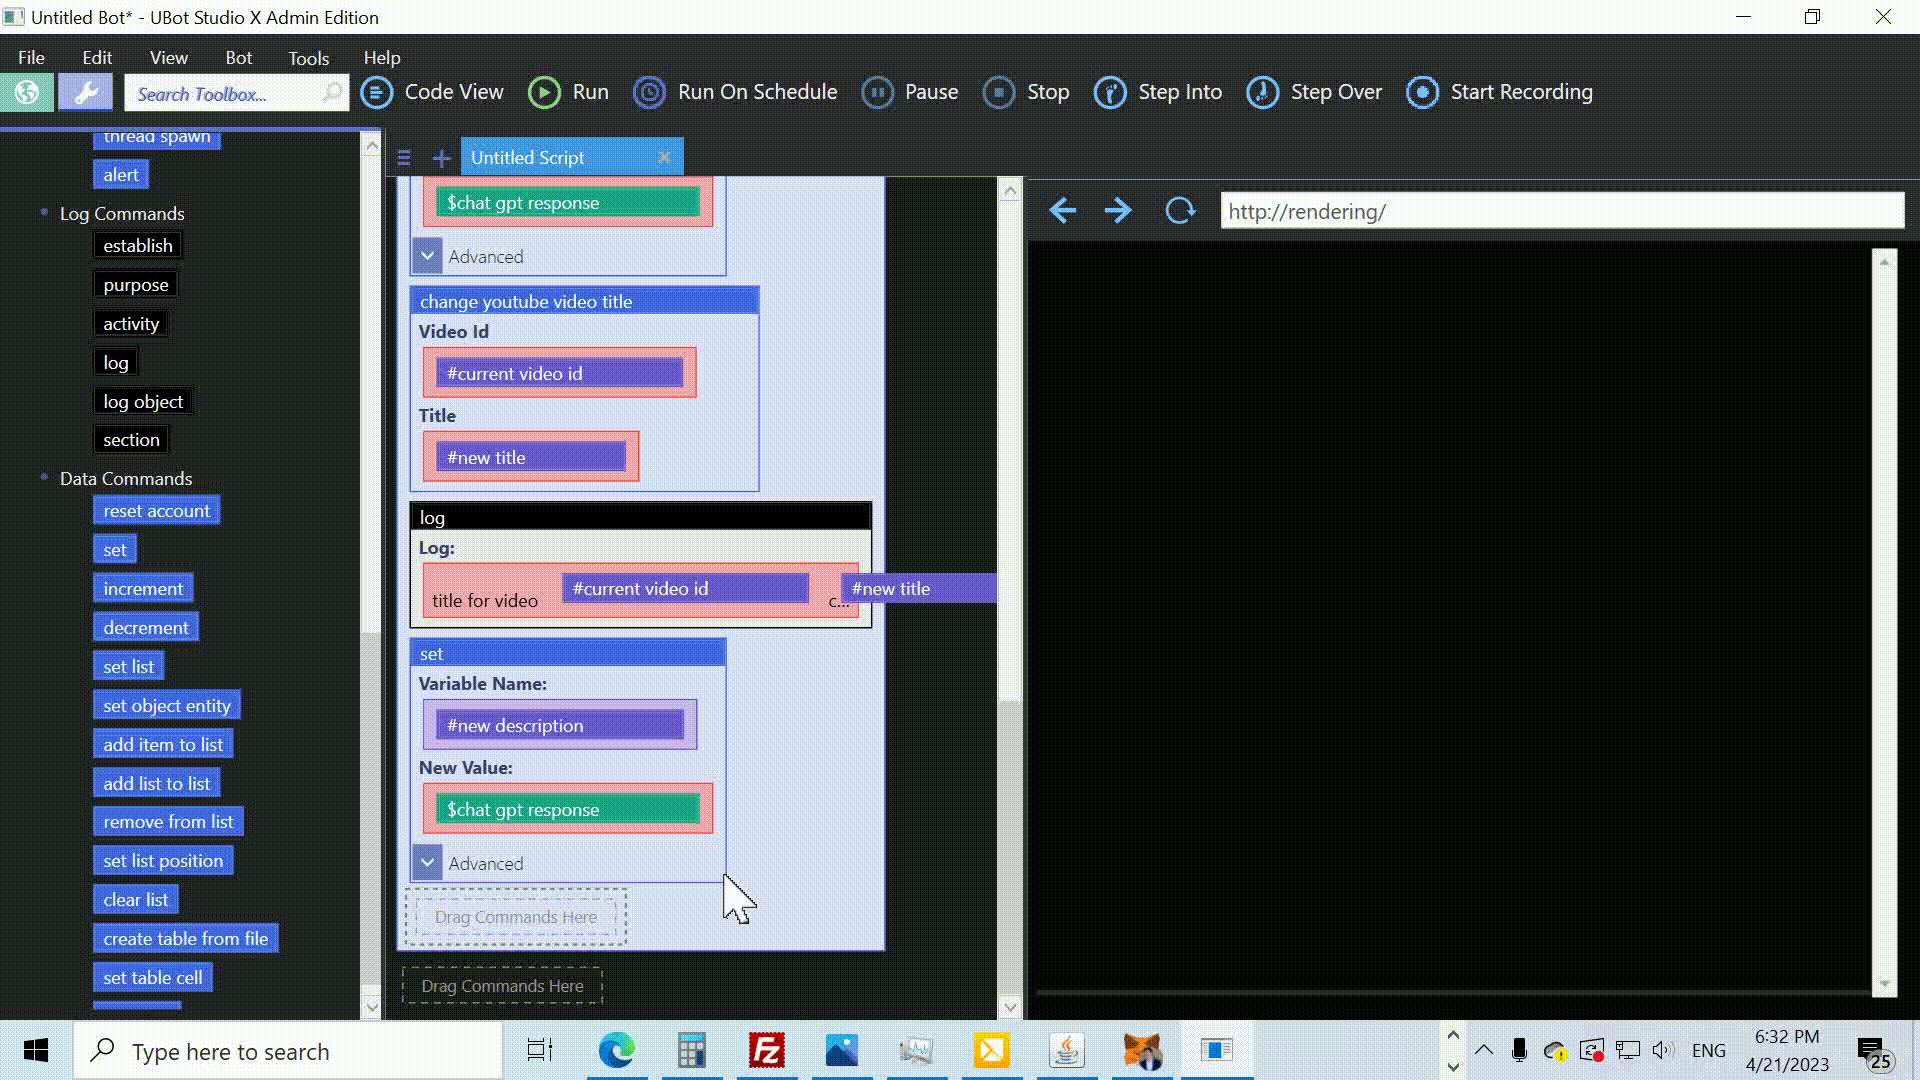
Now, let’s change the YouTube video title to the newly generated one. Drag the change youtube video title command and provide two parameters: #current video id and #new title.
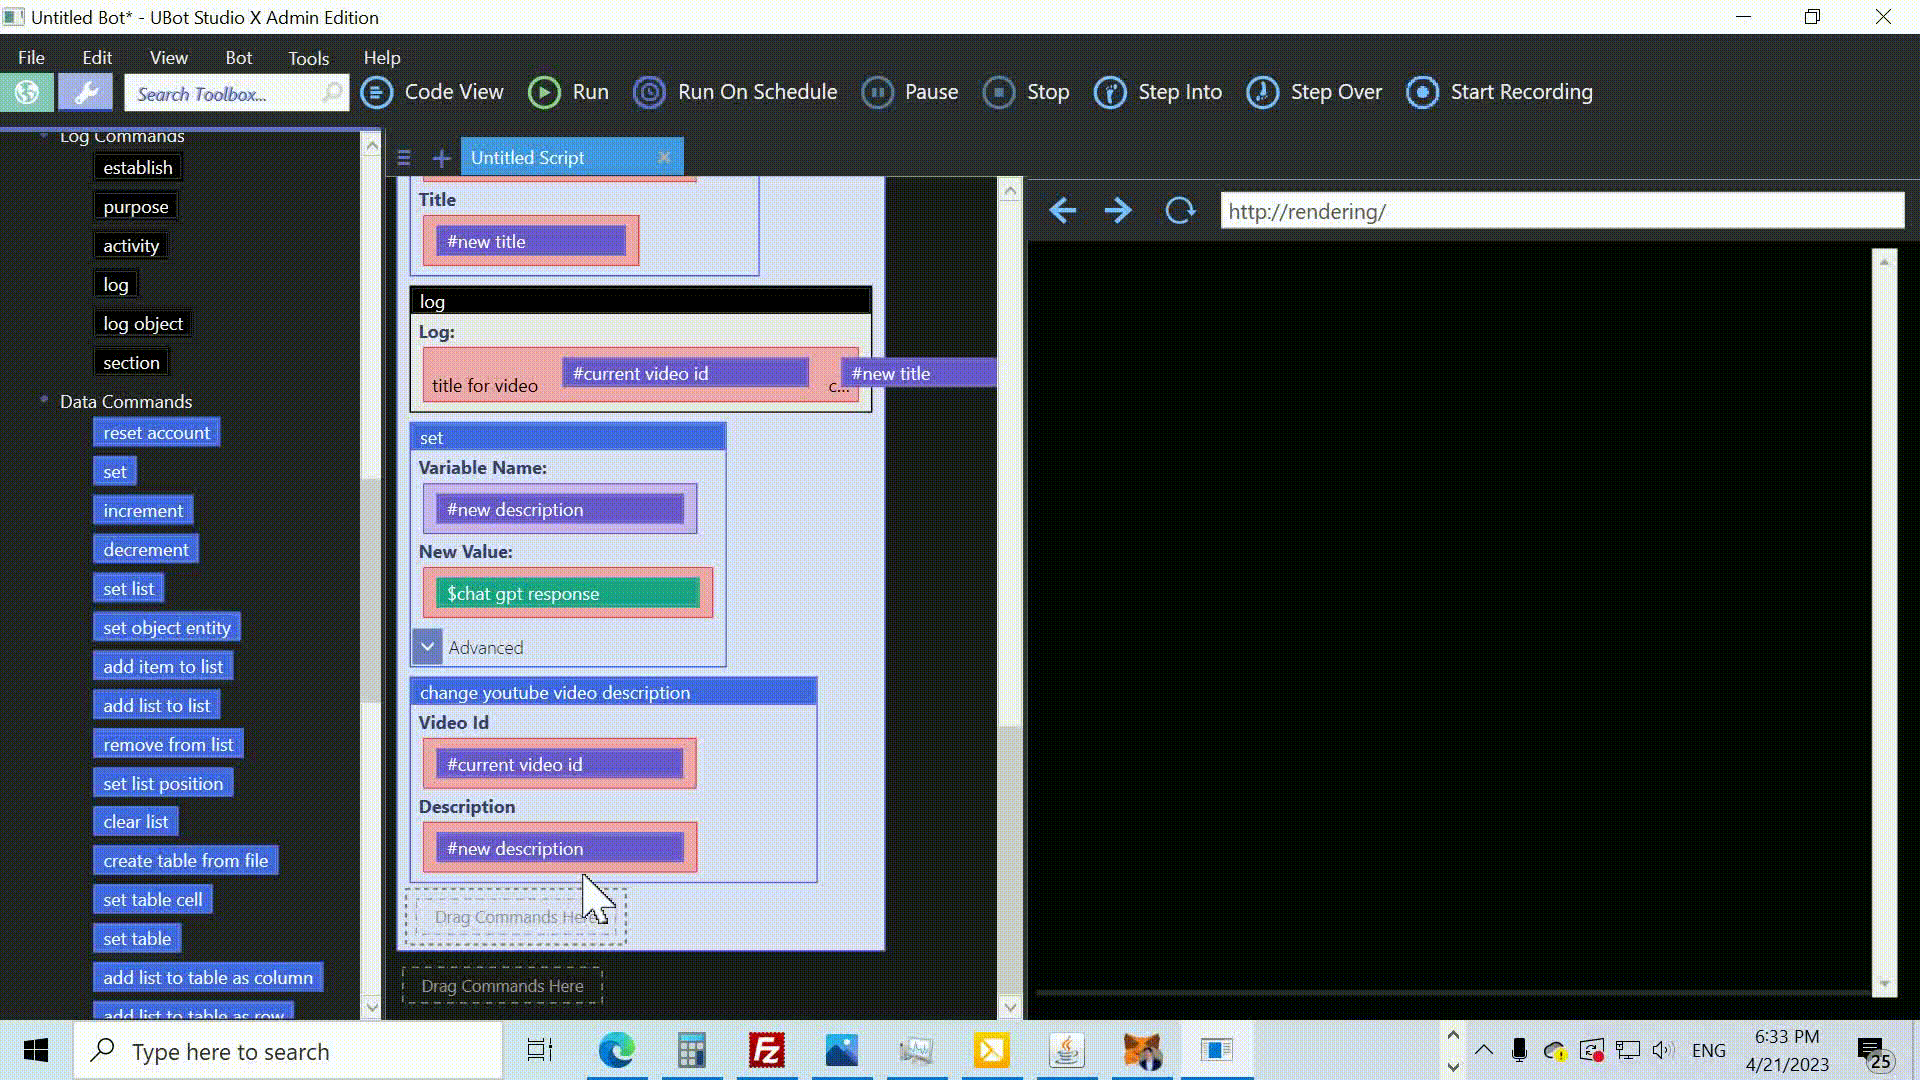
To keep track of the changes, we’ll use the log command with a message that includes both the video ID and the new title.
Similarly, we’ll generate a new description for the video using the set command to create a variable called #new description.
Call the $chat gpt response function again and this time we’ll ask it to create a description from the transcript.
Now, it’s time to update the YouTube video description. Drag the change youtube video description command into the script window and provide two parameters: #current video id and #new description .
Once again, use the log command to keep track of the changes, but this time include the new description in the message.
And there you have it! With these steps, your YouTube videos will now feature compelling titles and descriptions, meticulously crafted by advanced AI, that captivate your audience and elevate your content’s appeal. Embrace the power of smart botting to unlock your channel’s potential and enjoy the benefits of this cutting-edge technology.
Here’s the code! Remember to change the path to the client_secret.json file after downloading it from the Google Developer Console. Also replace the openai api key.
ui console view
config openai("YOUR_API_KEY")
connect to youtube("C:\secrets\client_secret.json")
set list(%videos,$get my videos(),"Local")
loop(10) {
    set(#current video id,$next list item(%videos),"Local")
    create chat gpt agent("ChatGPT","Your purpose is to look at a youtube transcript and generate either a video title or description based on the transcript.","gpt-4")
    set(#transcript,$get youtube transcript(#current video id),"Local")
    set(#new title,$chat gpt response("based on the following transcript, what would be the perfect clickbait title of this video? keep it short, less than 100 characters. here's the transcript:     {#transcript}","ChatGPT"),"Local")
    change youtube video title(#current video id, #new title)
    log("title for video    {#current video id}   changed to    {#new title} ")
    set(#new description,$chat gpt response("based on the following transcript, what would be the perfect description of this video?     {#transcript} ","ChatGPT"),"Local")
    change youtube video description(#current video id, #new description)
    log("title for video    {#current video id}   changed to    {#new title} ")
}